Upgrading the SAR application? Please read important notes before doing so.
Introduction
Follow these steps to enable speech analysis using Contact Lens and have the following results attached to your tickets:
-
Call transcription
-
Customer and agent sentiment
-
Categories based on rules set within Contact Lens
-
Conversation characteristics
NOTE: pay-as-you-go charges apply if you enable Contact Lens in your Amazon Connect instance.
Enabling Contact Lens in Amazon Connect
In order to have speech analysis from Contact Lens appended to your tickets, you will need to first enable Contact Lens in your Amazon Connect instance.
If Contact Lens has yet to be enabled in your Amazon Connect instance, please follow the instructions in the below link.
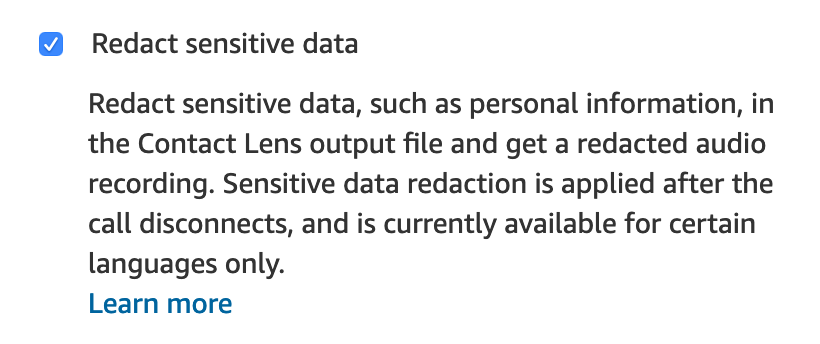
NOTE: The Amazon Connect app for Zendesk only supports analysis of redacted call recordings. As such please ensure that the following checkbox is ticked within the Set recording and analytics behaviour block in your inbound and outbound contact flows, otherwise you will not be able to attach Contact Lens' speech analysis to any of your tickets.
Installation guide
To enable this feature you will need to install a serverless application within the AWS Serverless Application Repository.
Sign in to your AWS account, then search for and select the Serverless Application Repository service.
Make sure you are in the same region as your Connect instance.
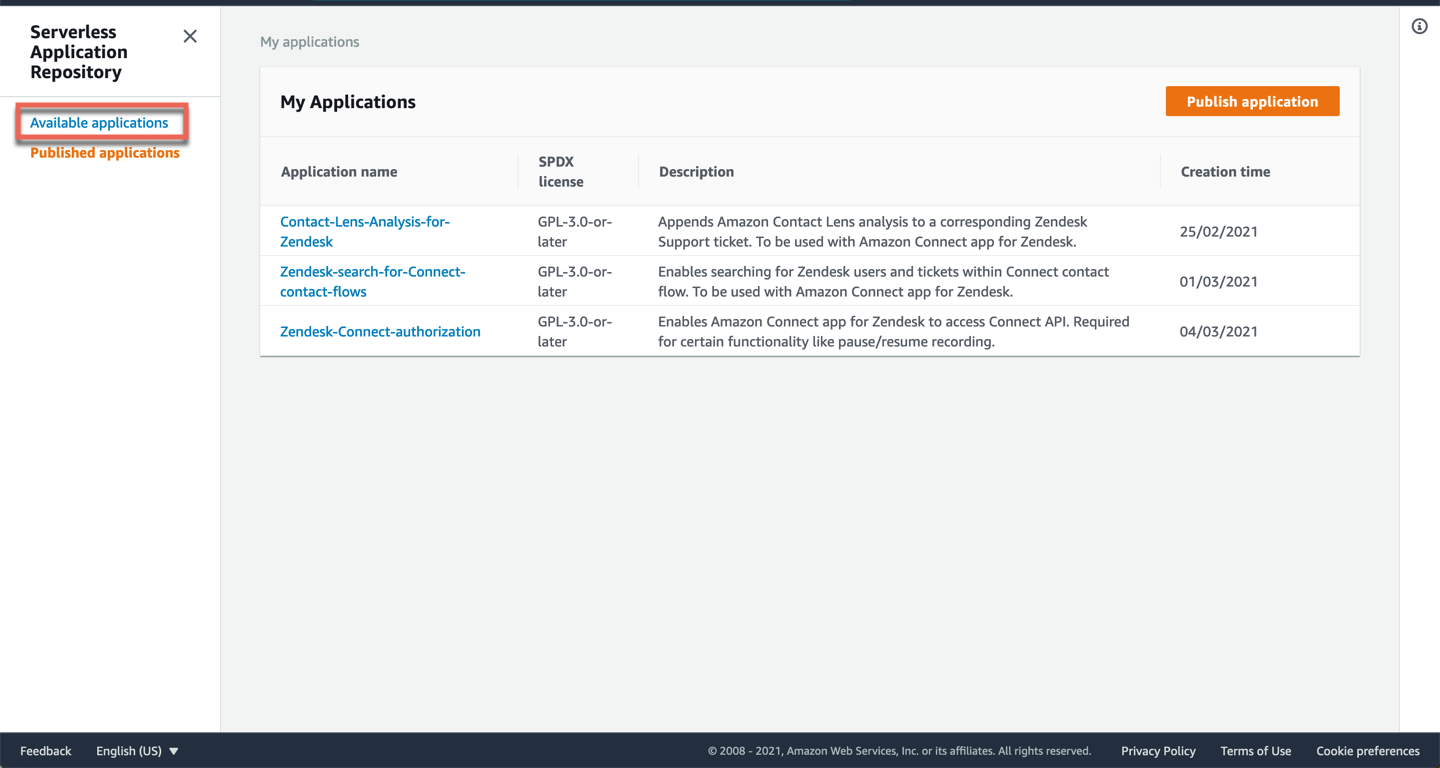
Click on Available applications.
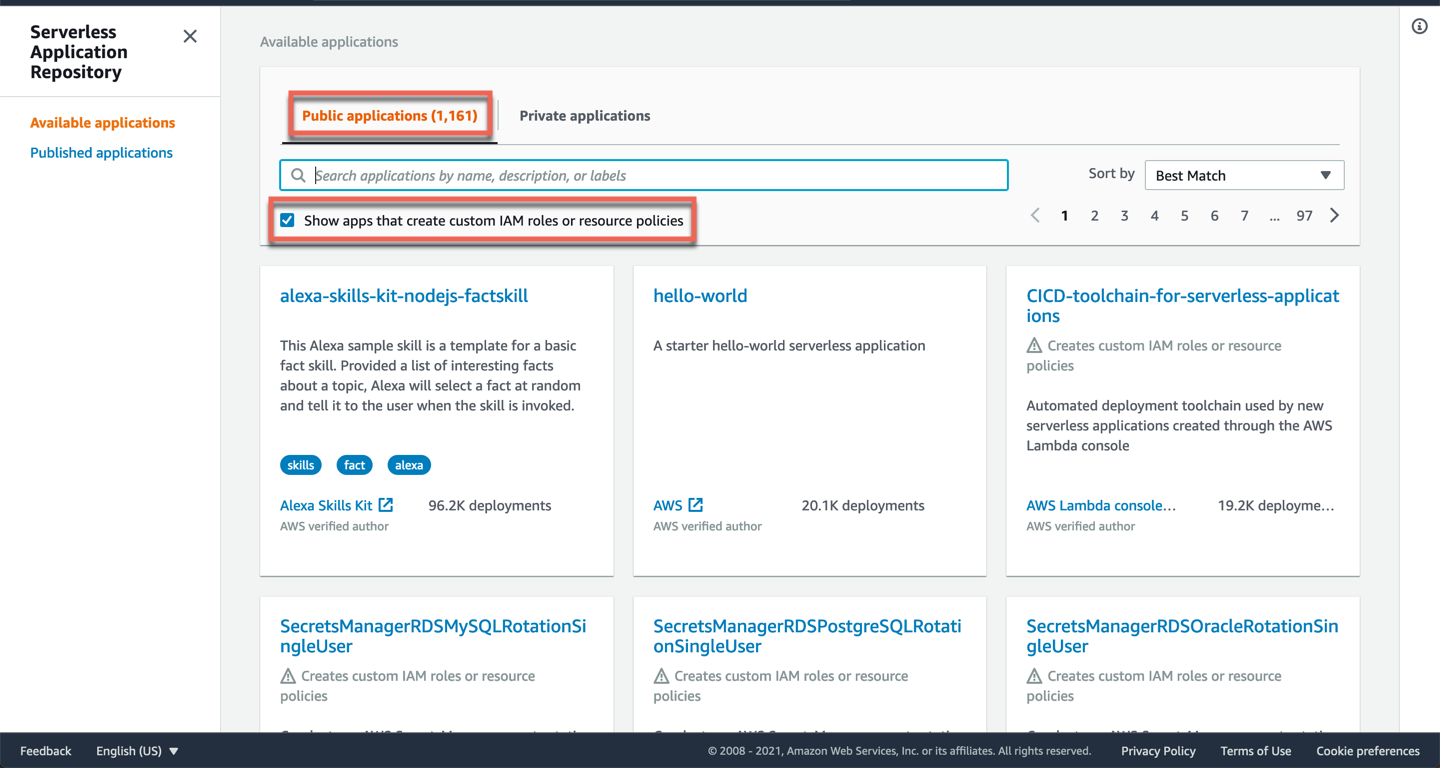
Under Public applications, select the checkbox Show apps that create custom IAM roles or resource policies.
Search for and select Contact-Lens-Analysis-for-Zendesk.
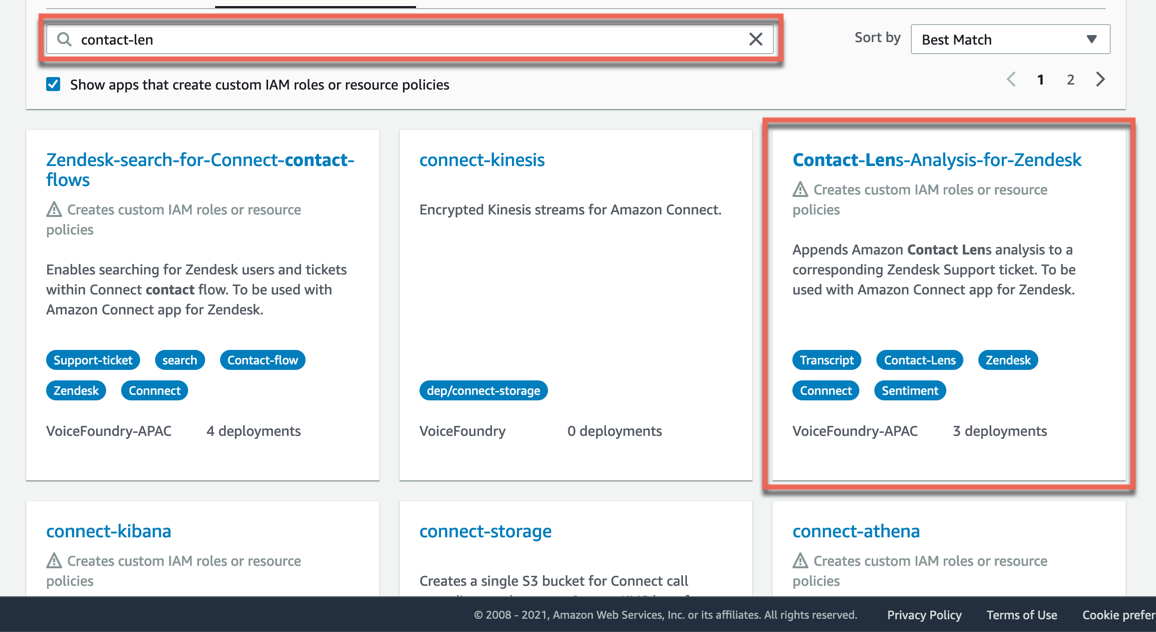
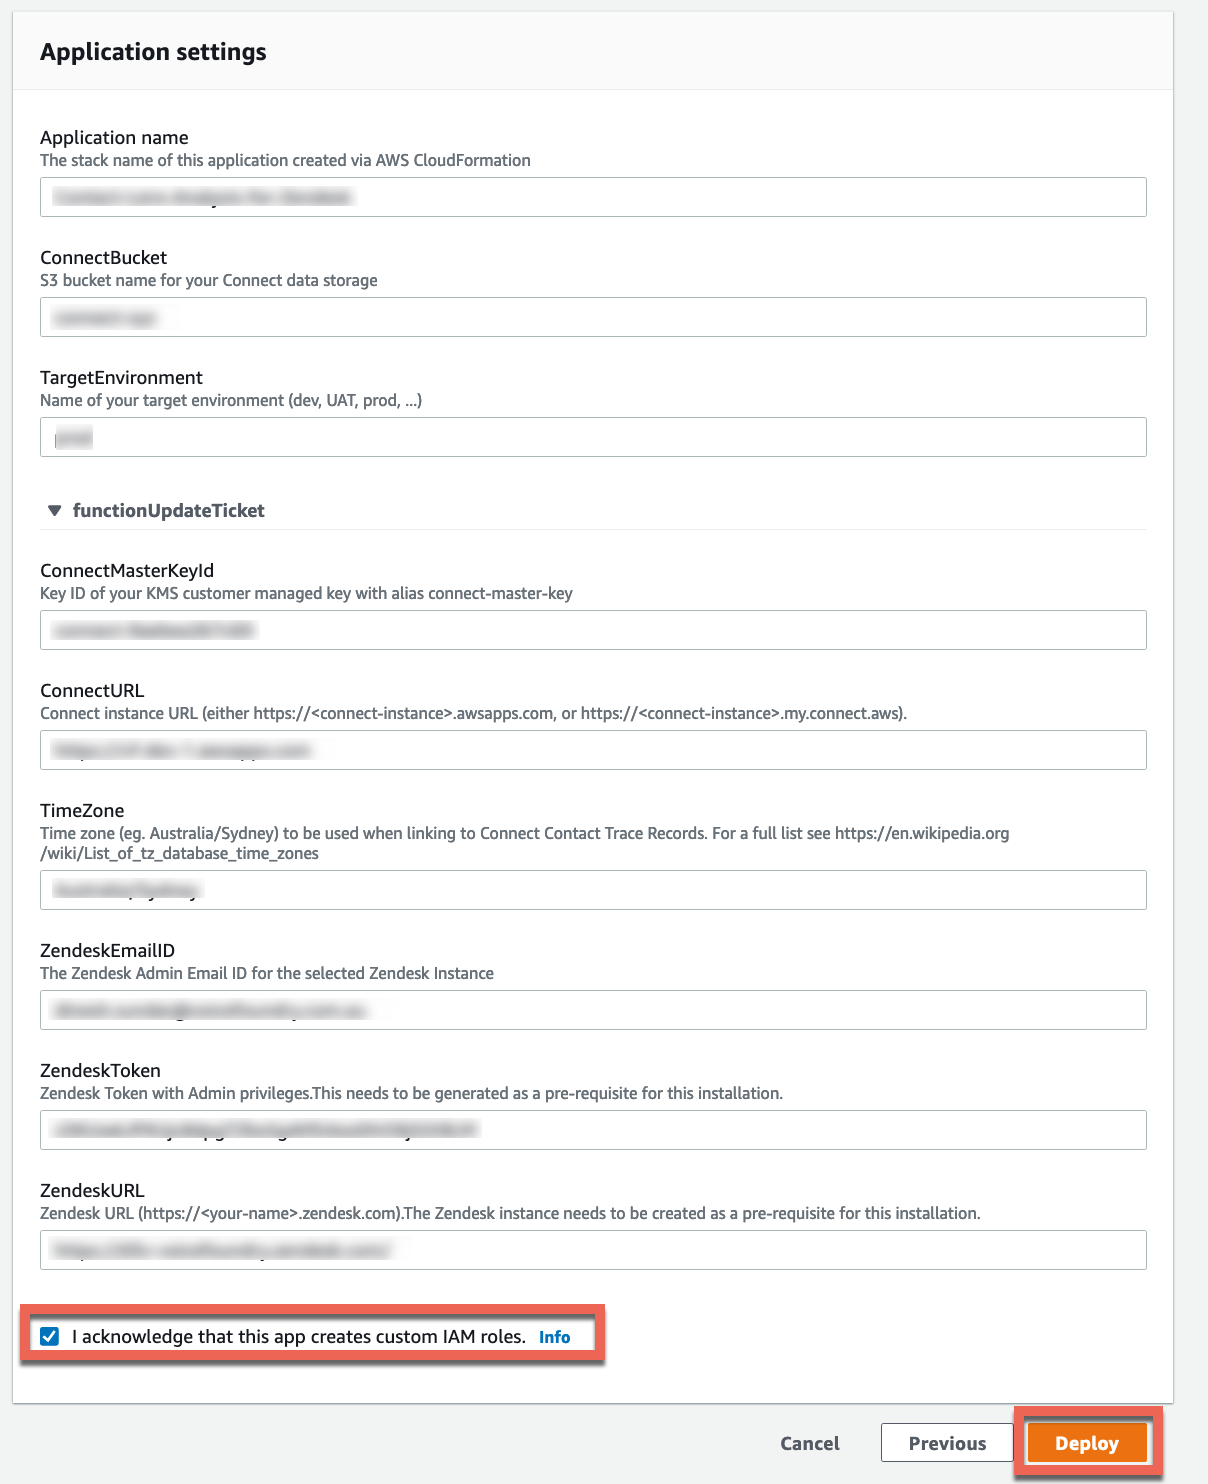
Scroll down to Application settings and enter the following information:
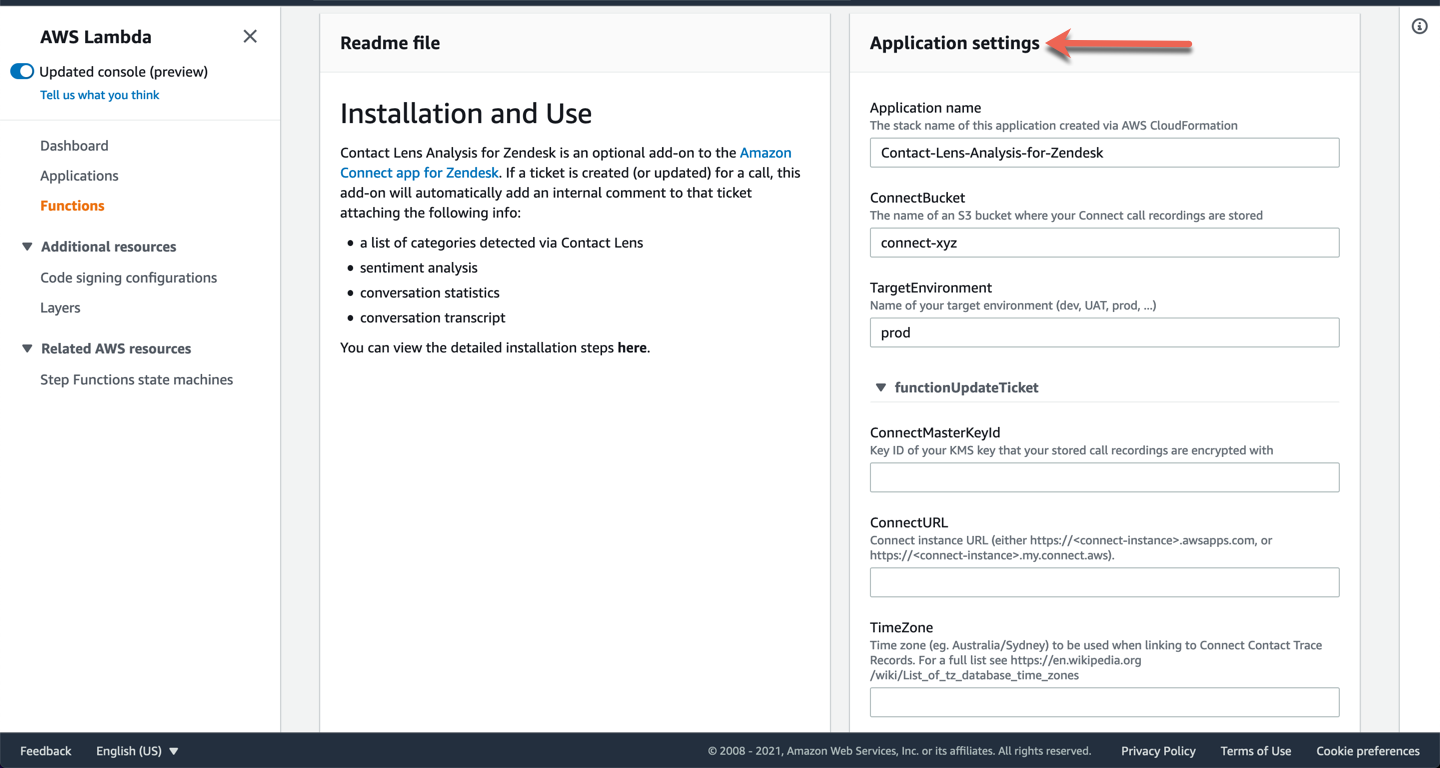
Application name
Leave this name as is.
ConnectBucket
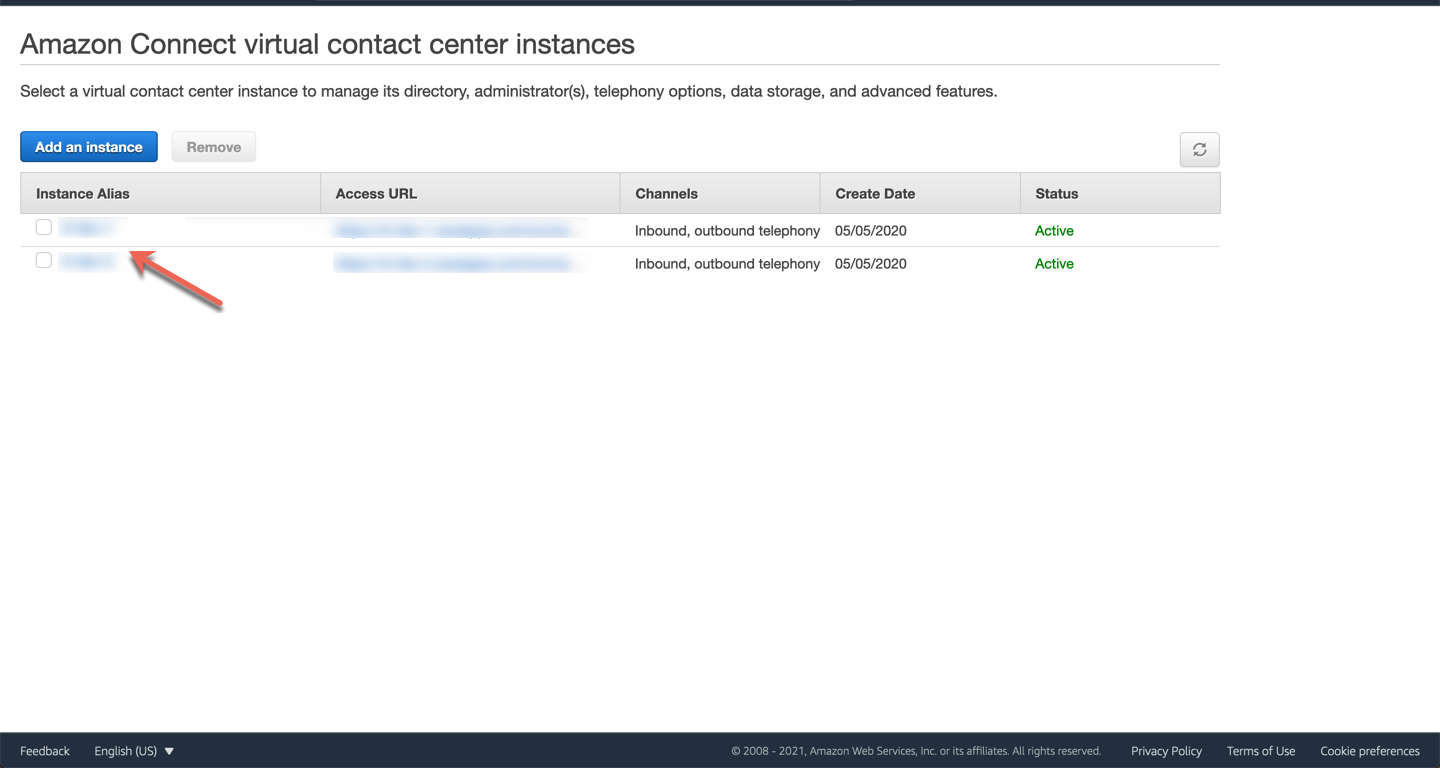
You will need to enter the name of the S3 bucket that call recordings from your Connect instance are being stored in. To find the name of the S3 bucket for your Connect instance, search for and select Amazon Connect within your AWS account. Select your Connect instance.
Click on Data storage.
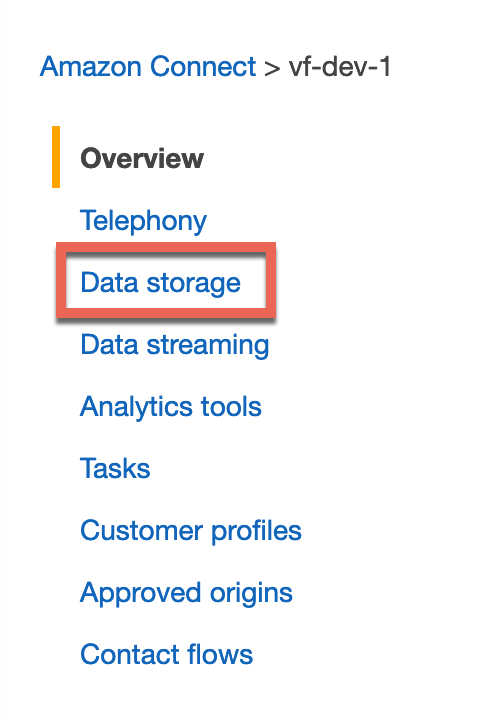
Your S3 bucket name can be found here (up to the first forward slash).
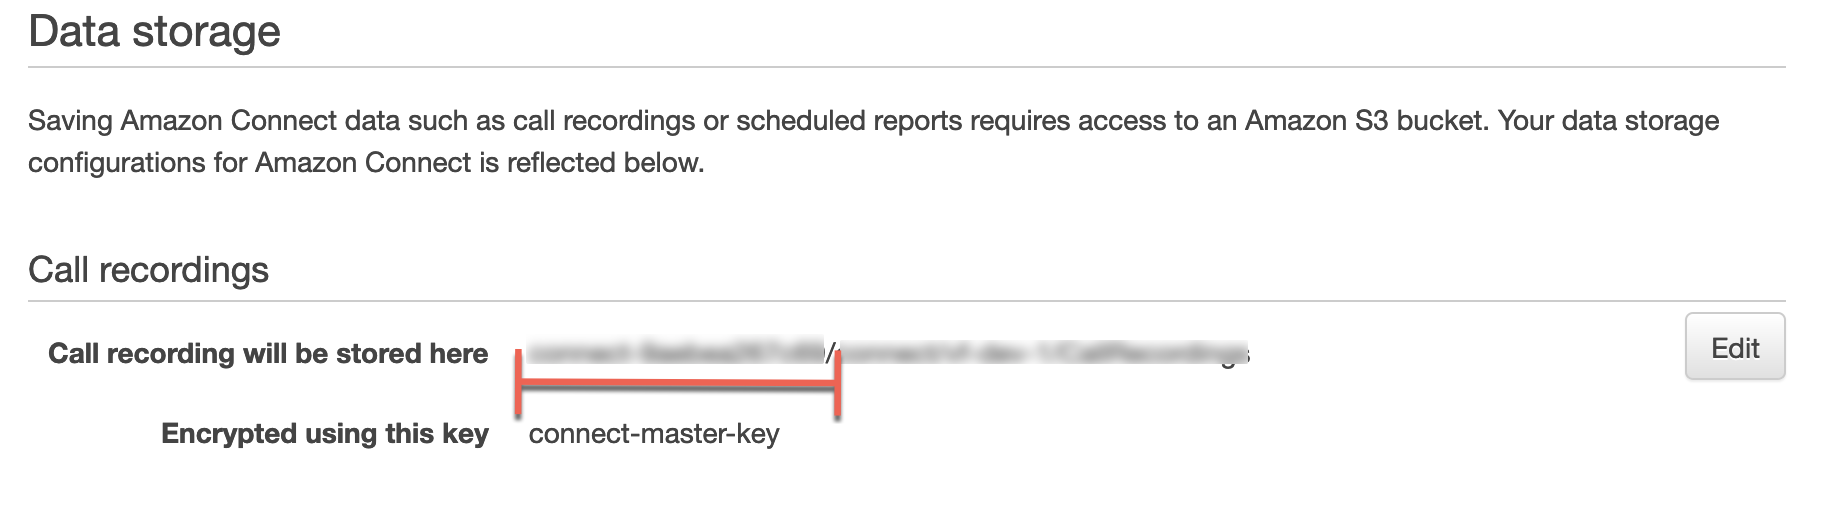
Copy this S3 bucket name into the ConnectBucket field.
TargetEnvironment
This is the name of your target environment (dev, UAT, prod etc). If unsure, just leave as prod.
ConnectMasterKeyId
Your call recordings from your Connect instance must be encrypted in order for speech analysis to work. Encryption is enabled by default for all call recordings using Amazon S3 server-side encryption with KMS. You can view more information about recording behaviour here.
To find the Key ID search for and select Amazon Connect within your AWS account. Select your Connect instance.
Click on Data storage.
The alias name of your Key ID will be found here. Note this name down as you will need to search for it in the next step.
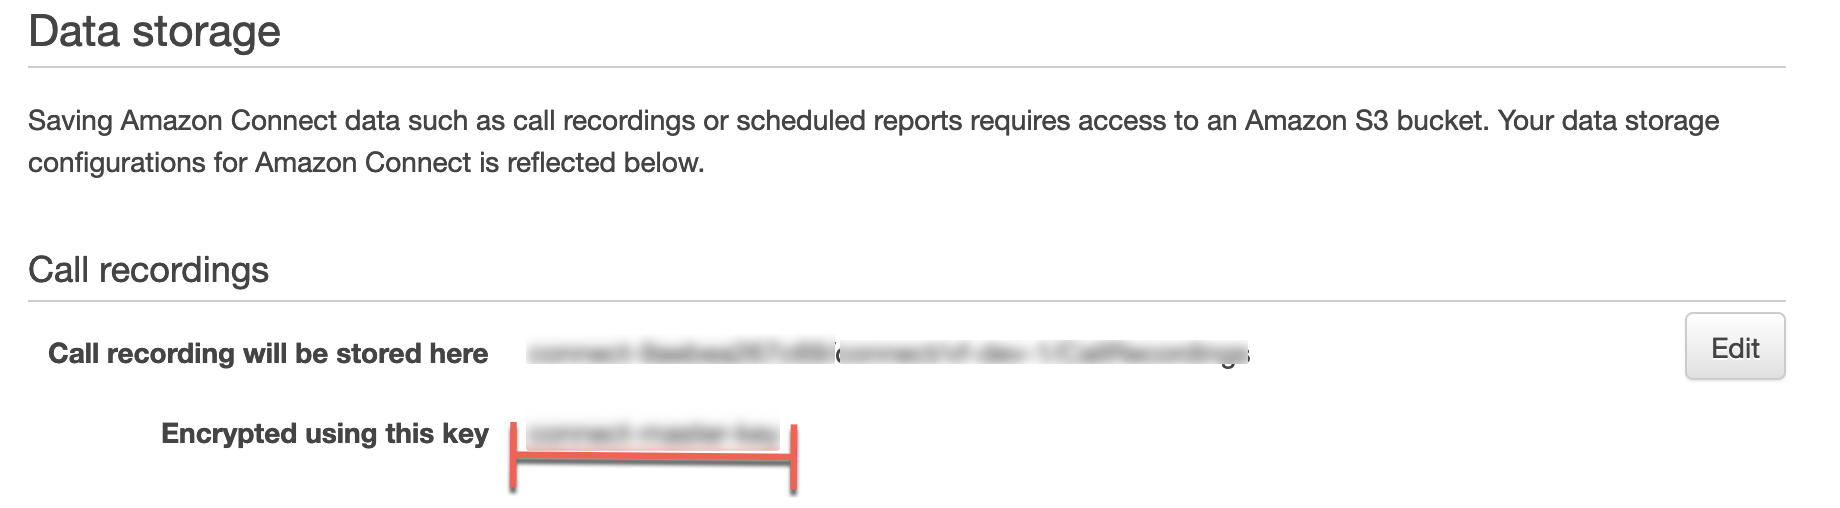
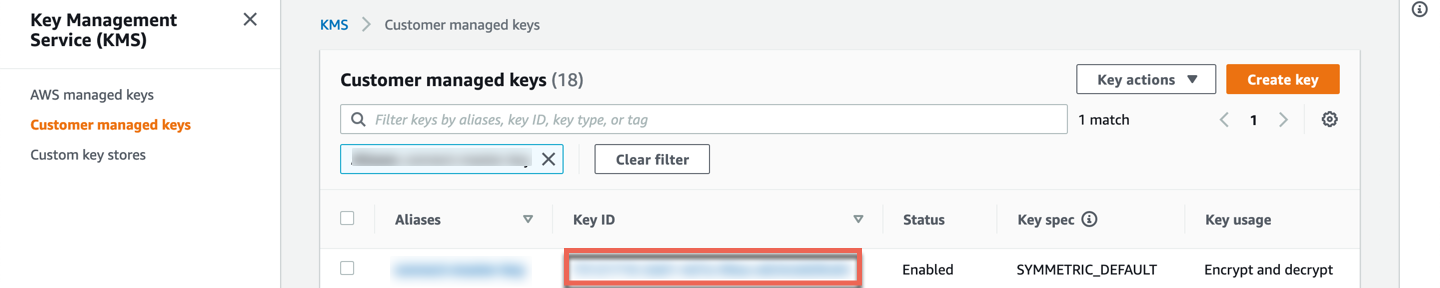
In your AWS account, search for and select the Key Management Service service. Search for the alias name of your Key ID which you noted down in the previous step. Based on how you configured your encryption for recordings, you may need to search within both AWS managed keys and Customer managed keys to locate your Key ID.
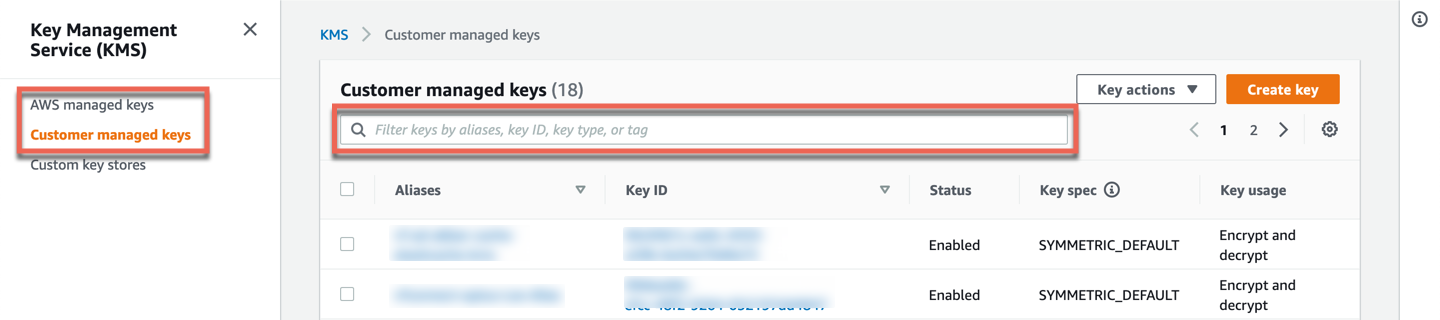
Copy and paste the Key ID into the ConnectMasterKeyId field.
ConnectURL
Enter your Connect instance URL (the format of the URL should be either https://<connect-instance>.awsapps.com, or https://<connect-instance>.my.connect.aws).
TimeZone
Enter your local timezone in the following format (e.g. Australia/Sydney). View a full list of timezones here.
TranscriptLocation
Select one of the two options from the drop down menu:
-
Voice comment - transcript will be stored in a TPE v2 voice comment (default), or
-
Internal note (legacy) - transcript will be added to the ticket as an internal note.
See further notes and examples of both at the end of this guide.
ZendeskEmailID
Enter the verified email address of a Zendesk user for your Zendesk instance.
ZendeskToken (Zendesk API Key)
Sign in to your Zendesk instance. Click on Admin within the left hand navigation bar, and under Apps and Integrations select, “Zendesk API”
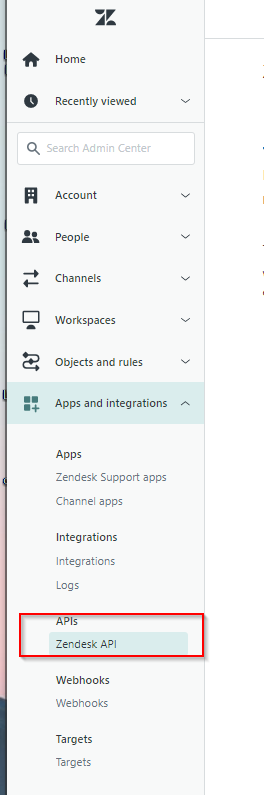
Click on Add API token.

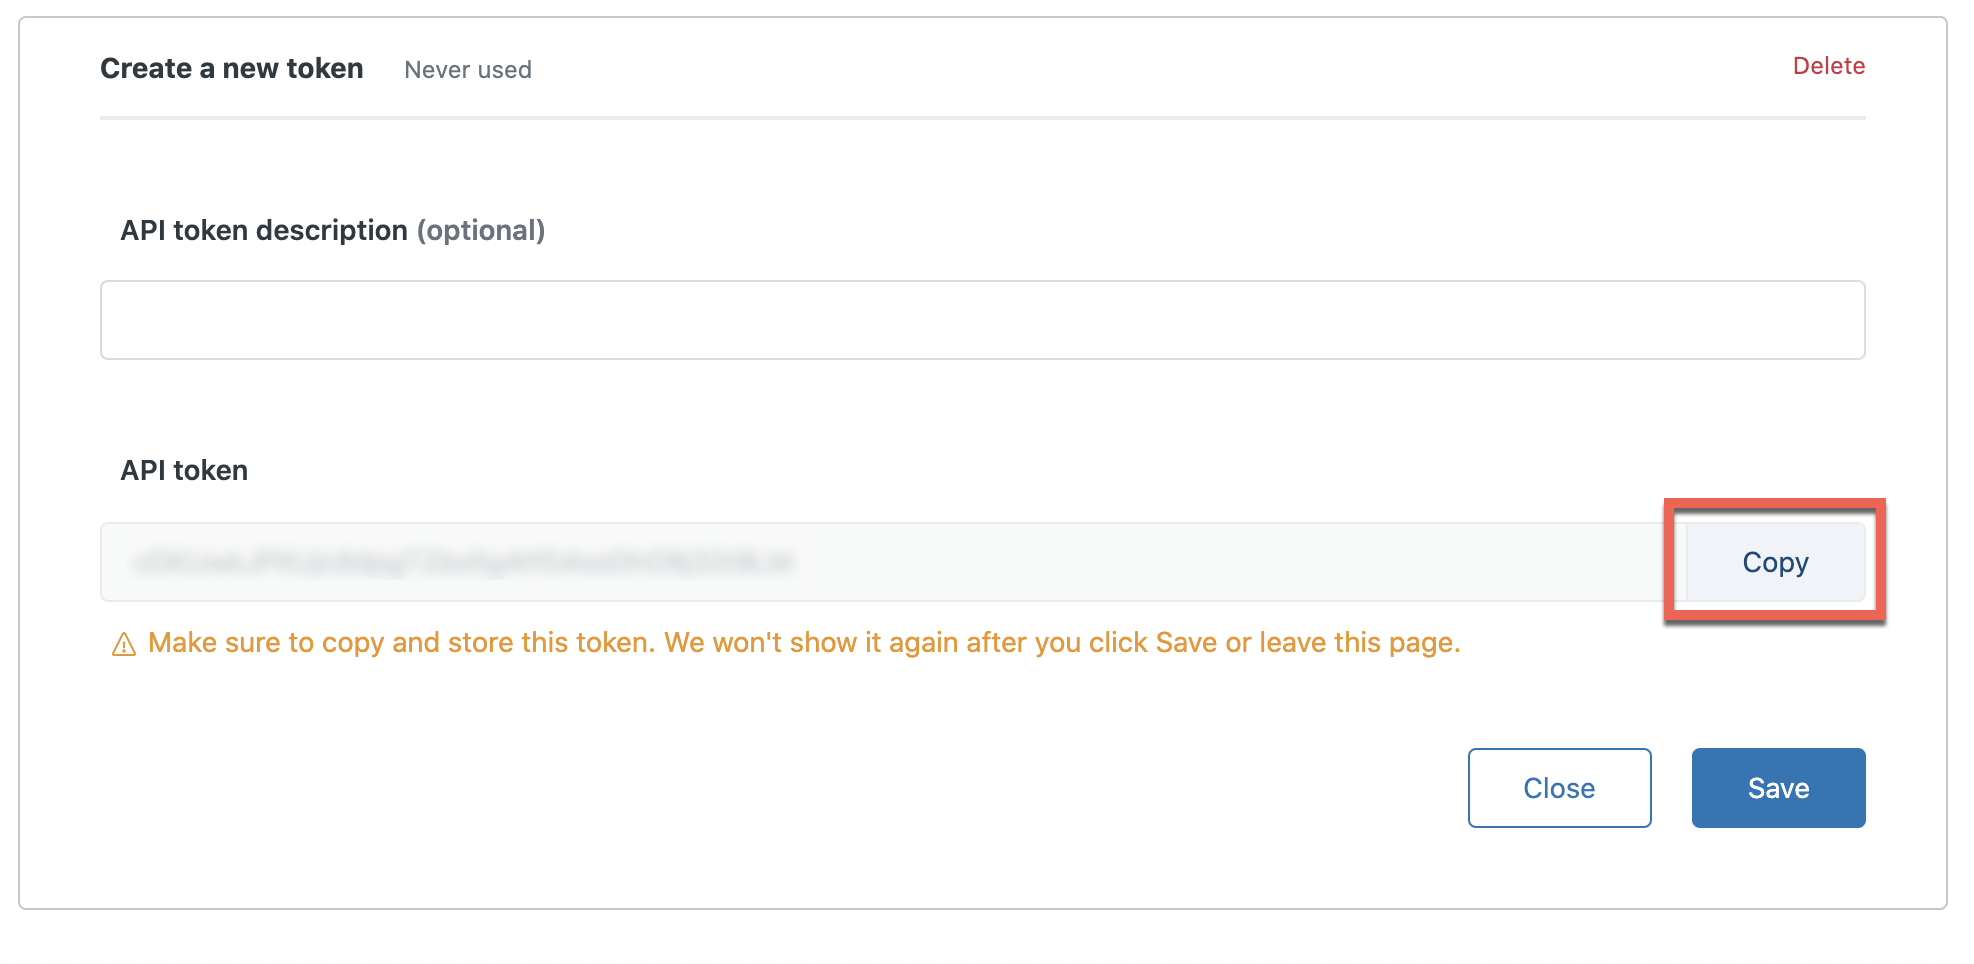
Name the API Token and Click on Copy. Paste the API token into the ZendeskToken field.
ZendeskURL
Enter the URL of your Zendesk instance. Ensure the URL begins with https:// and does not include / at the end of the URL or the stack will fail.
Select the checkbox to create custom IAM roles and click on Deploy.
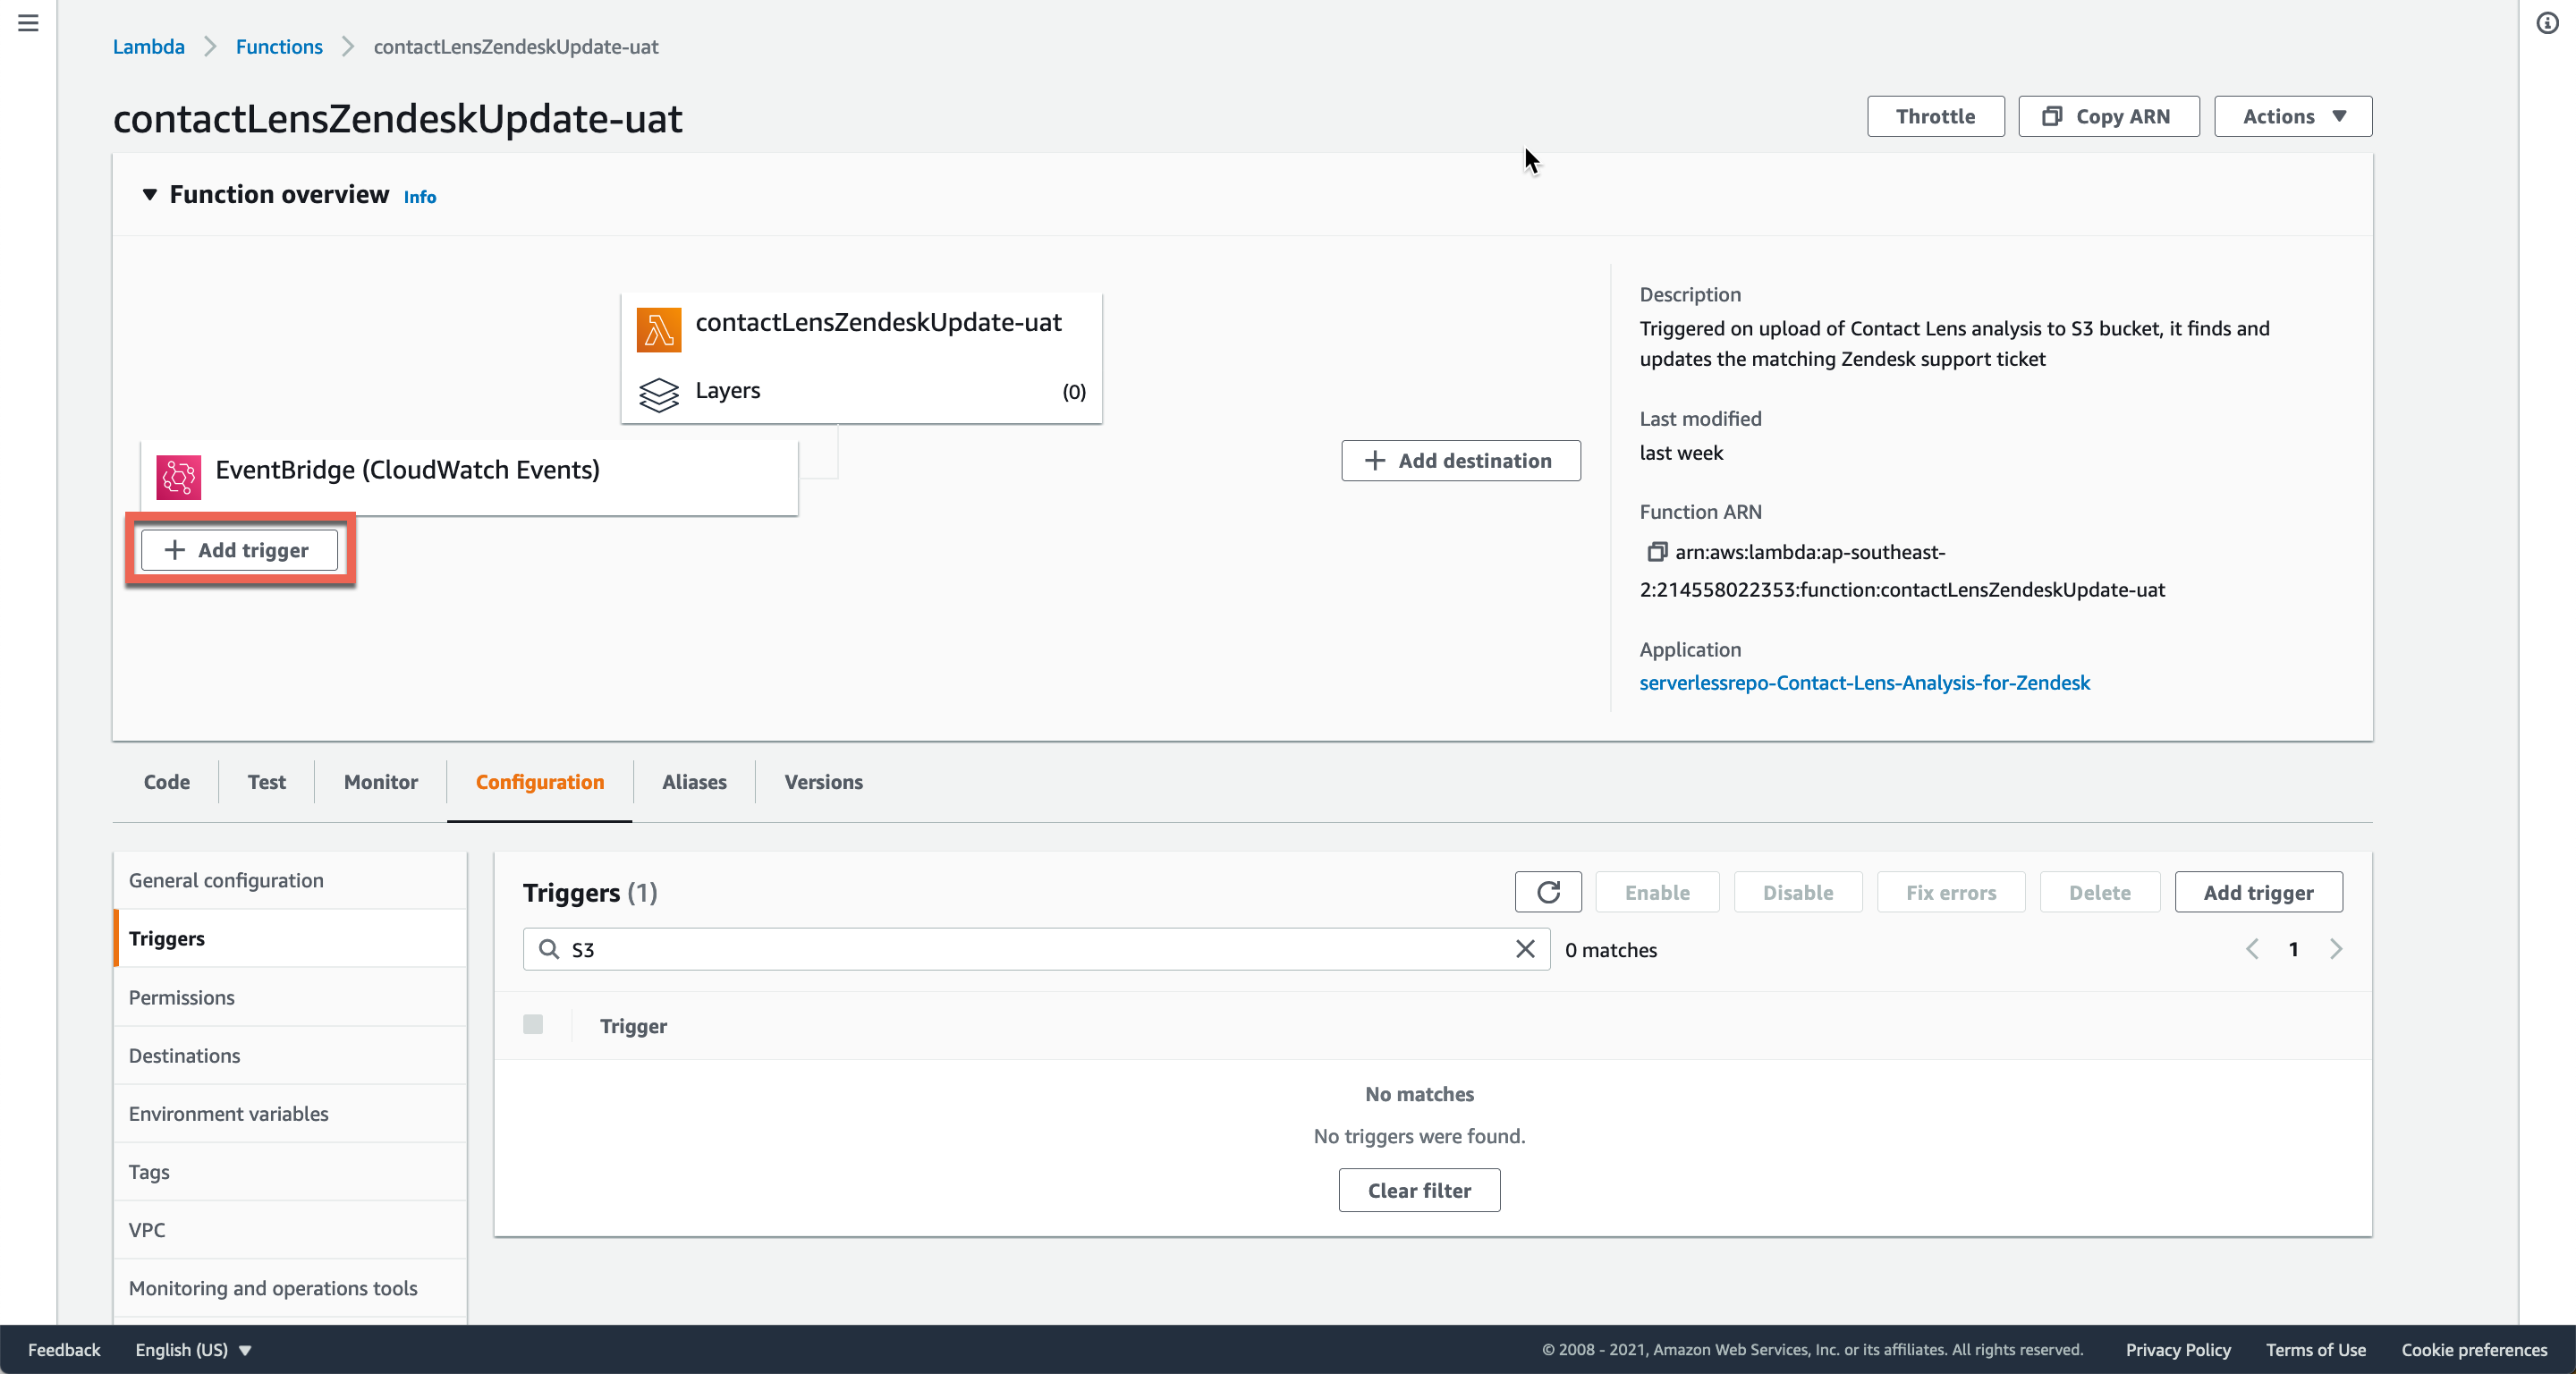
Once the stack has successfully been deployed, scroll down and click on functionUpdateTicket.
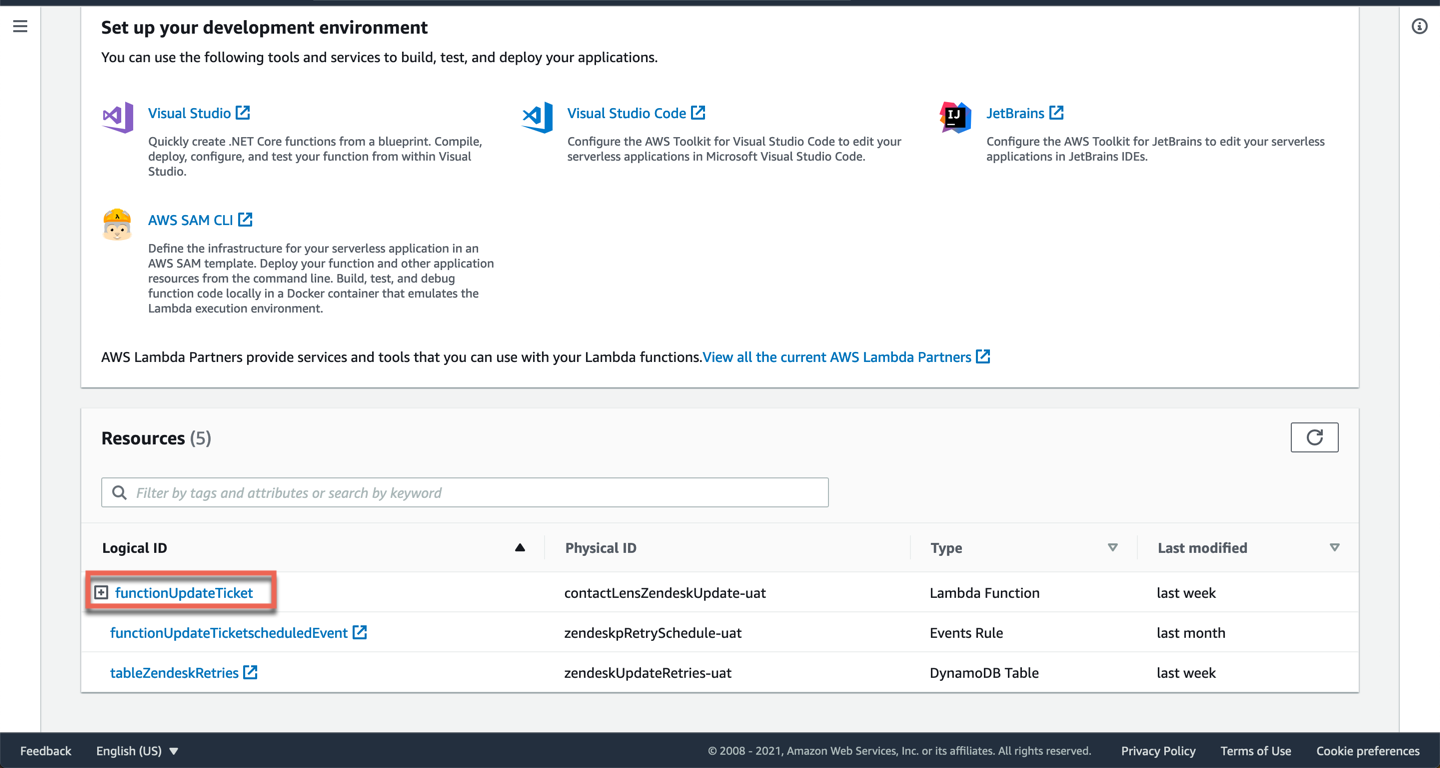
Click on Add trigger.
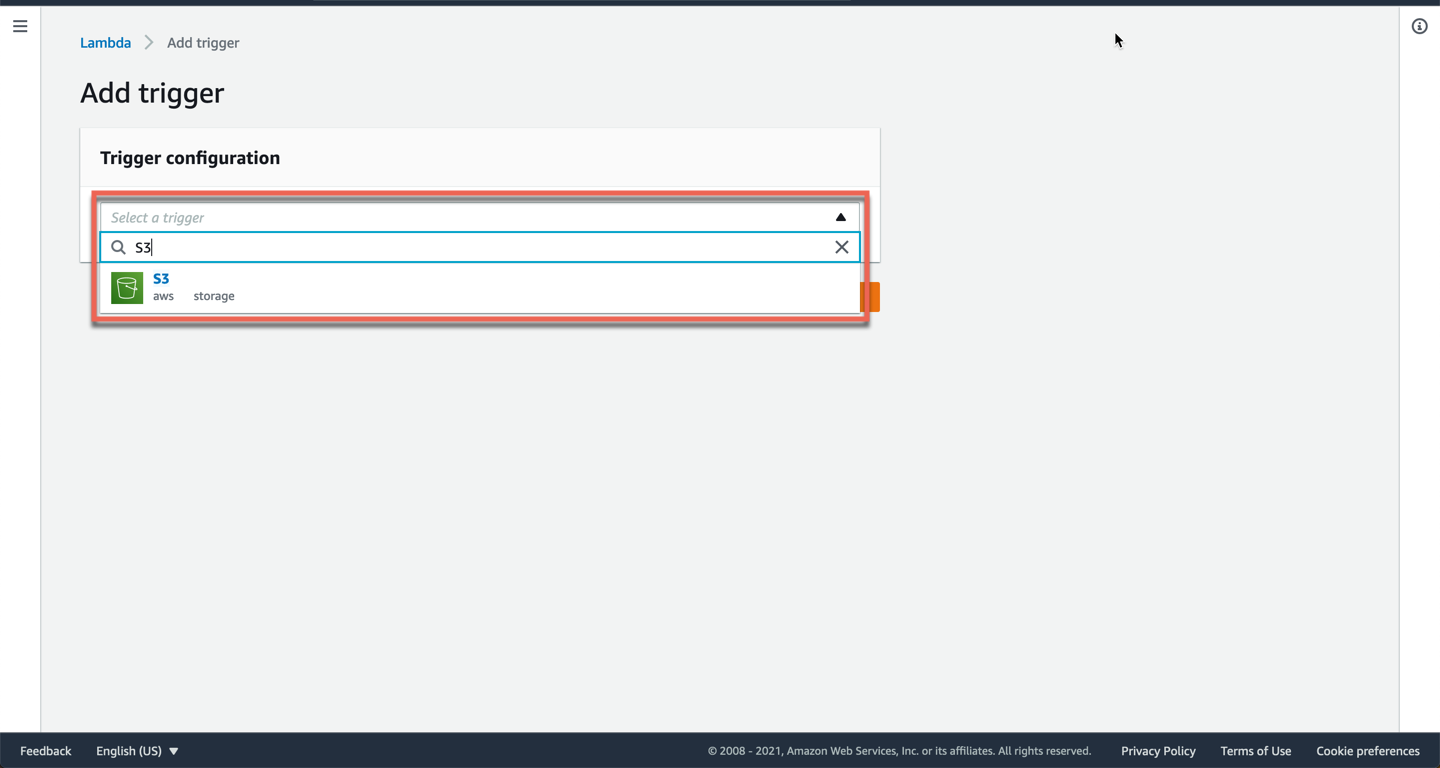
In the dropdown search for and select S3.
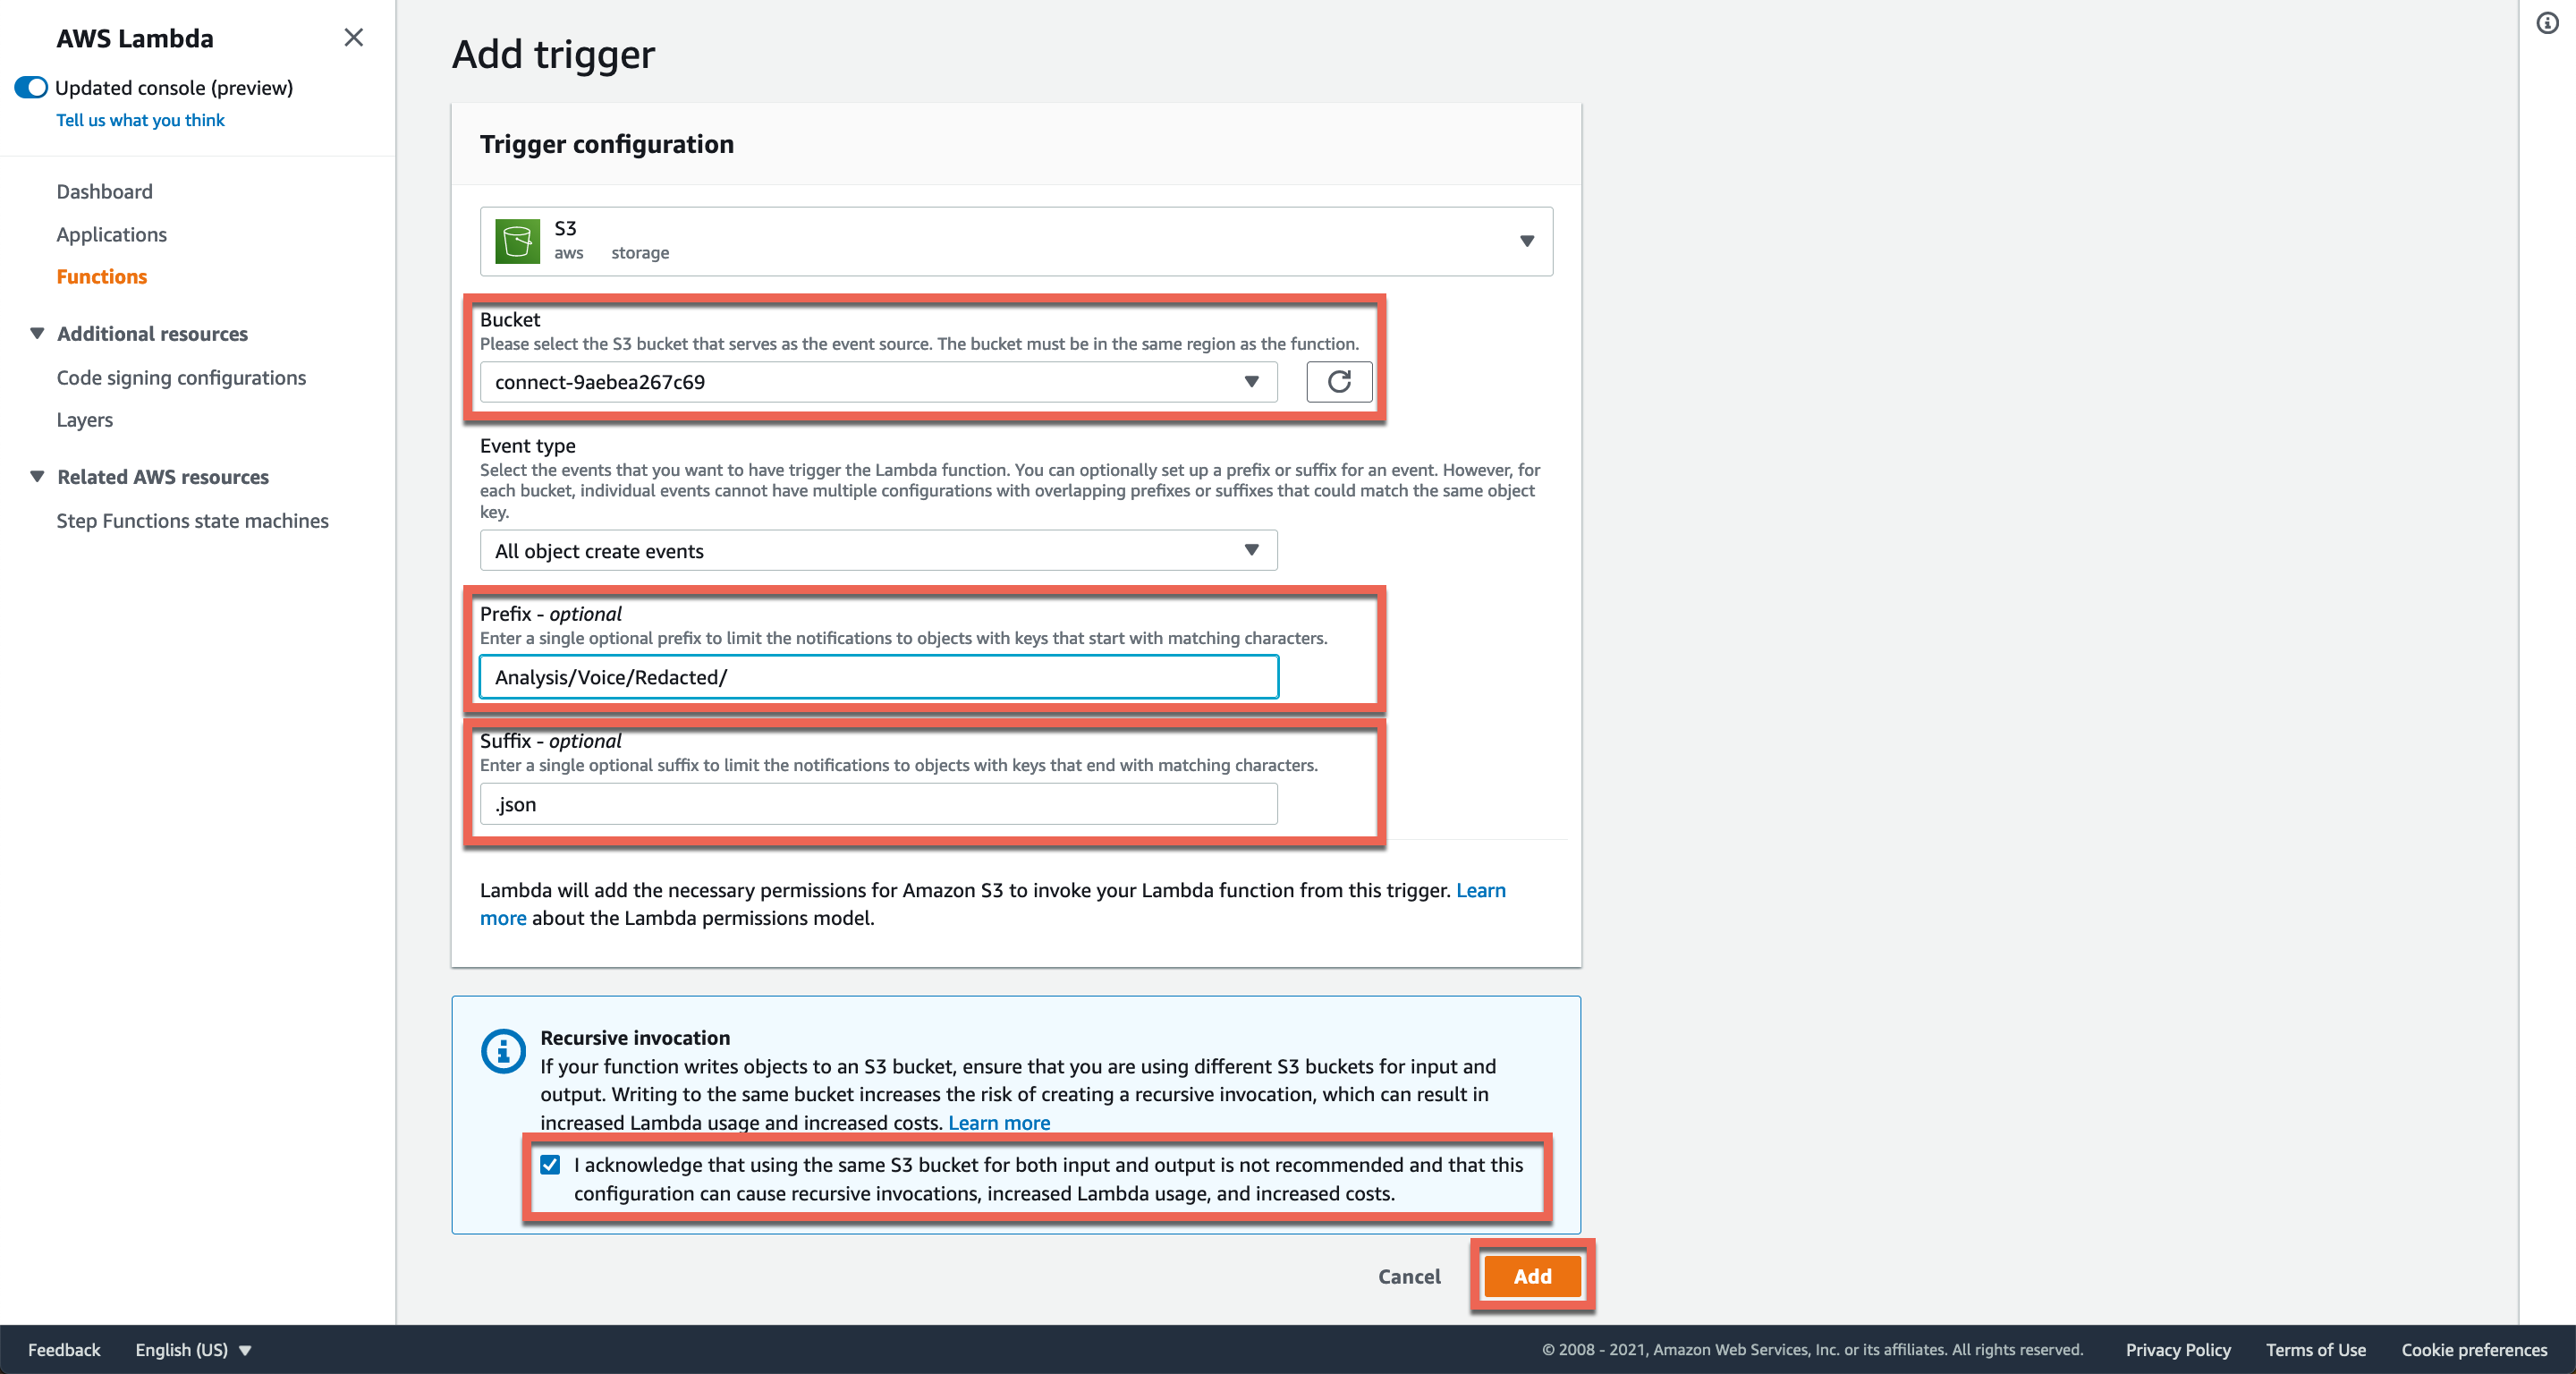
In the Bucket field select the S3 bucket that call recordings from your Connect instance are being saved in.
In the Prefix field enter Analysis/Voice/Redacted/
In the Suffix field enter .json.
Tick the Recursive invocation checkbox and click Add.
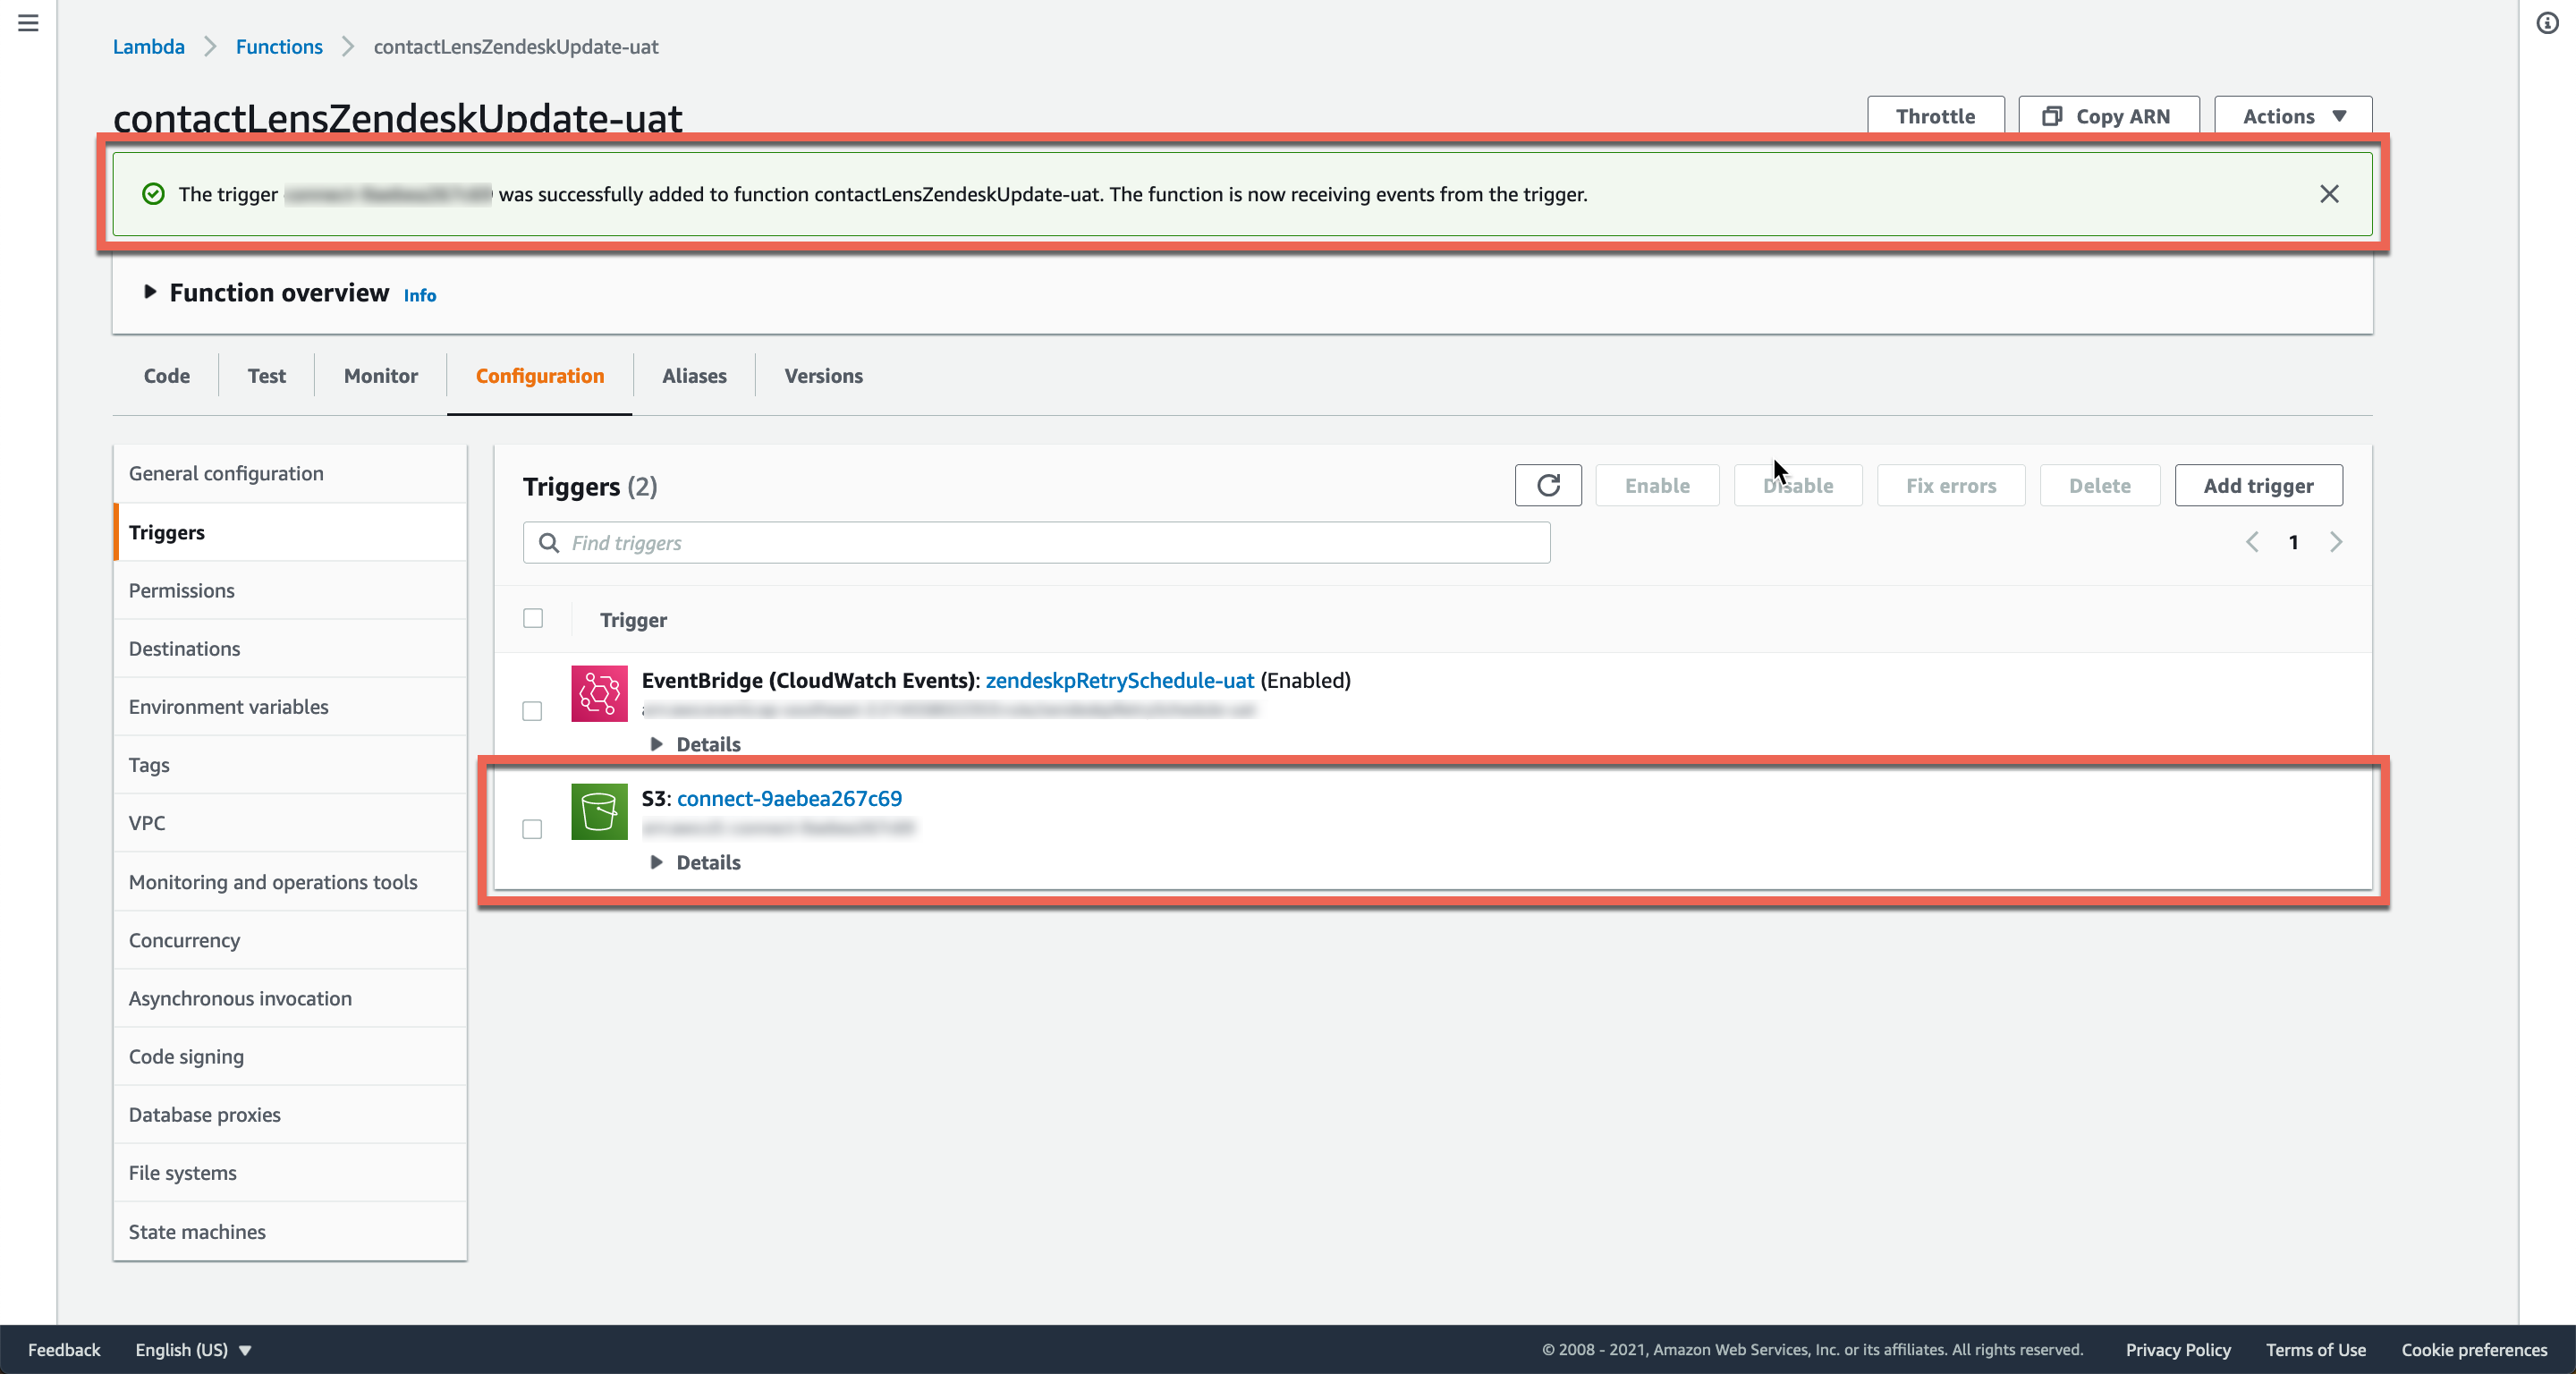
The trigger for S3 will be added.
Once the above has been configured, any calls with Contact Lens enabled within the contact flow will have the following attached to a Zendesk ticket.
-
Call Transcription
-
Customer and agent sentiment
-
Categories based on rules set within Contact Lens
-
Conversation characteristics
Attaching Contact Lens' speech analysis to Zendesk tickets
Once the following criteria has been met, Contact Lens will automatically attach its speech analysis to a Zendesk ticket.
-
Enable Contact lens for your Connect instance.
-
Enable Contact Lens within the Set recording and analytics behaviour block of your inbound and outbound contact flows.
NOTE: The Amazon Connect app for Zendesk only supports analysis of redacted call recordings.
As such please ensure that the following checkbox is ticked within the Set recording and analytics behaviour block of your inbound and outbound contact flows, otherwise you will not be able to attach Contact Lens' speech analysis to any of your tickets.
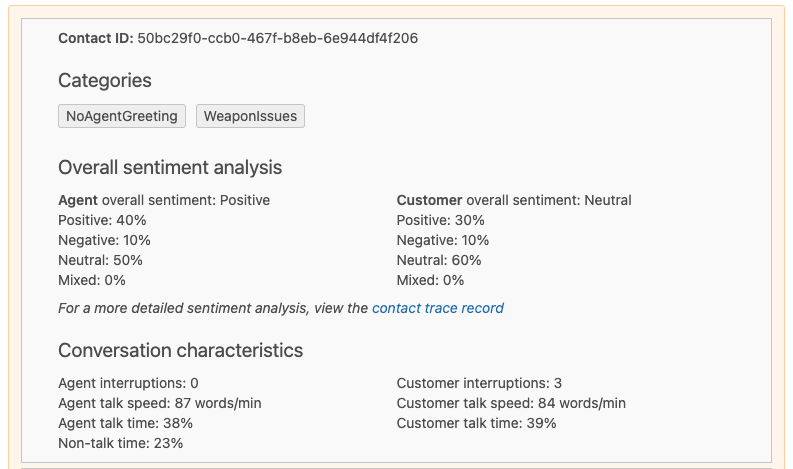
Once a call has ended, the following information will be attached to your Zendesk ticket:
NOTE: It may take a few minutes before Contact Lens processes the call recording and the related Zendesk ticket is updated.
Categories, overall sentiment analysis, and conversation characteristics
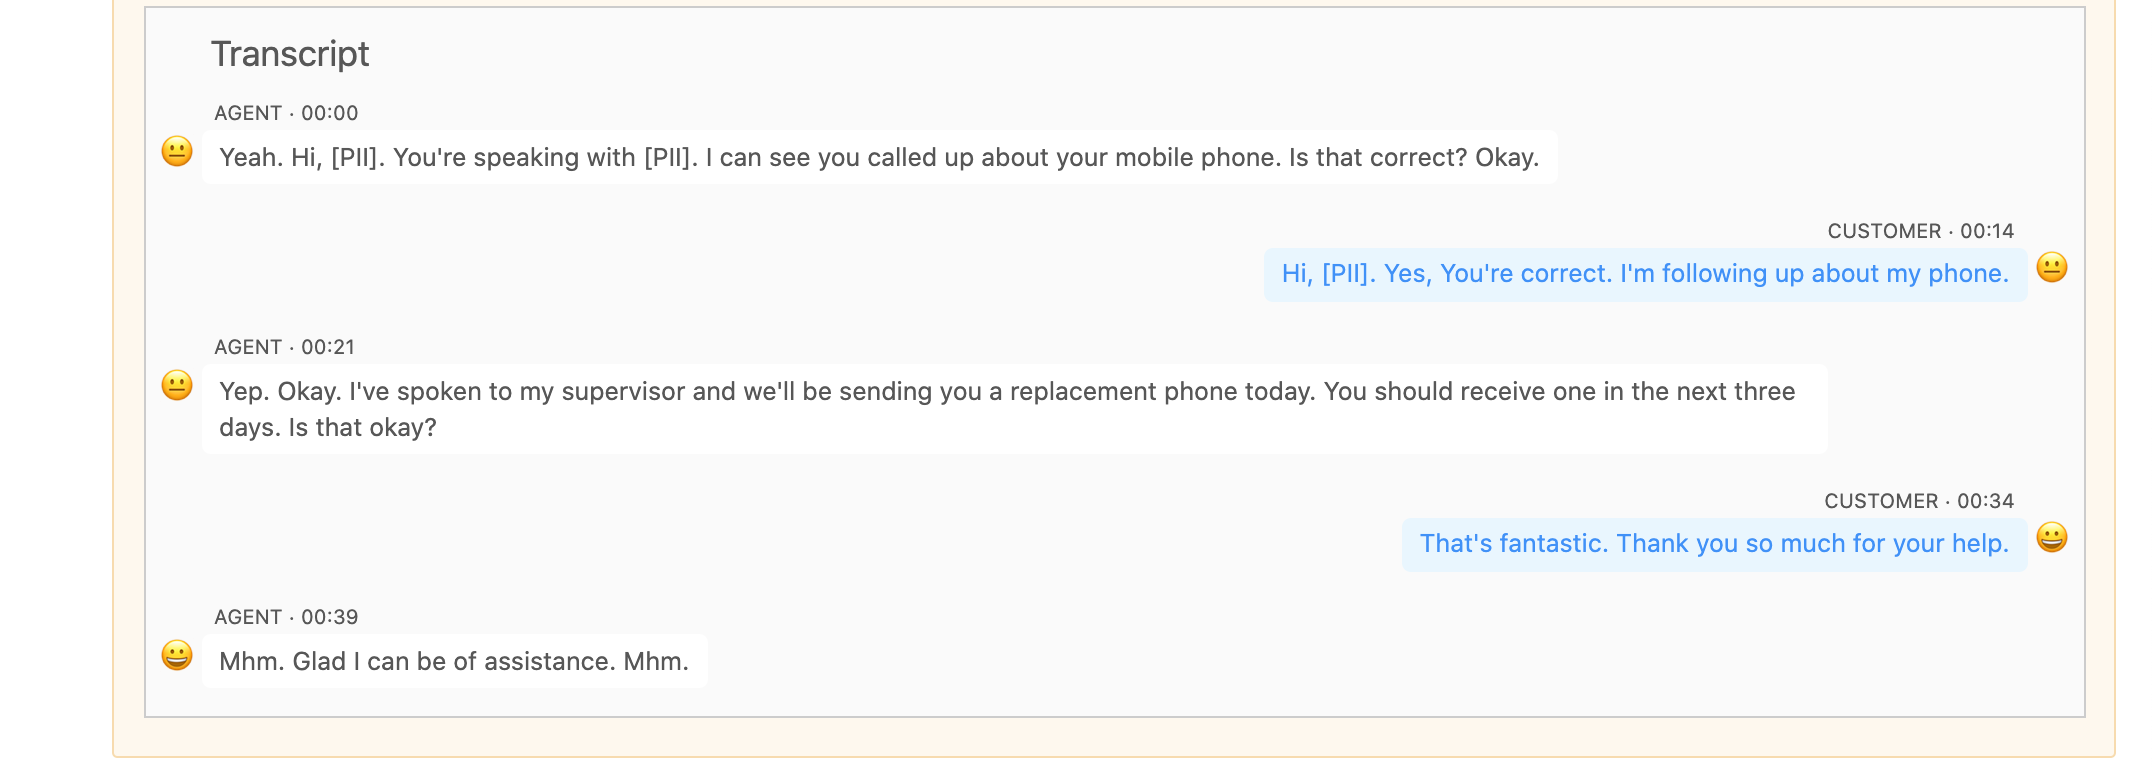
Transcript
Transcript can be configured to appear either as an internal note in the ticket:
or a Zendesk TPE v2 voice comment (shown her in expanded view):
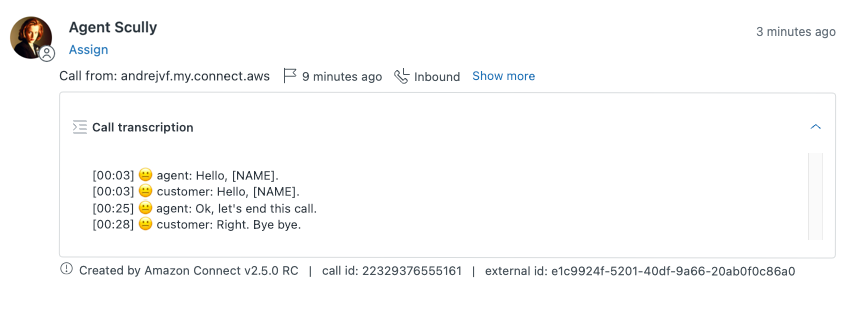
Each has advantages and shortcomings. TPE v2 voice comment can be collapsed and thus takes minimal space in the ticket, which is beneficial especially with long conversations, significantly reducing the amount of scrolling required. The legacy internal note on the other hand enables Zendesk search of the transcript content which TPE v2 voice comment doesn’t support at the moment. It’s drawback is that it can’t be collapsed and makes tickets with long conversations more tedious to traverse.
While you need to choose between the two at installation time, it’s easy to change your mind later:
-
Go to your AWS console and select Lambda service.
-
Find your Zendesk Contact Lens Lambda by searching for phrase “contactLensZendeskUpdate” and open it.
-
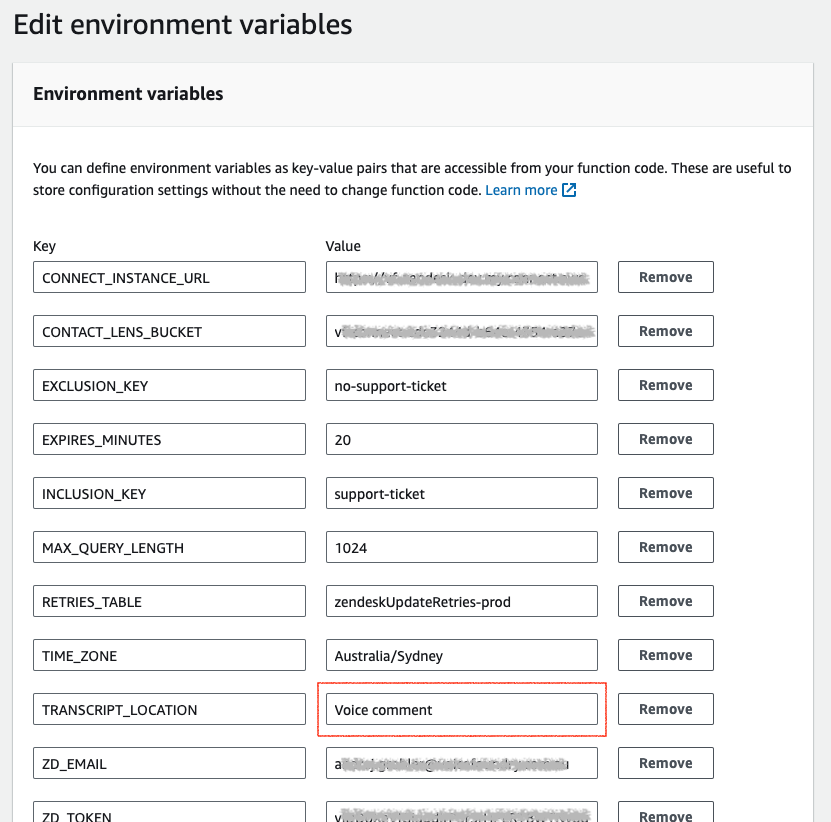
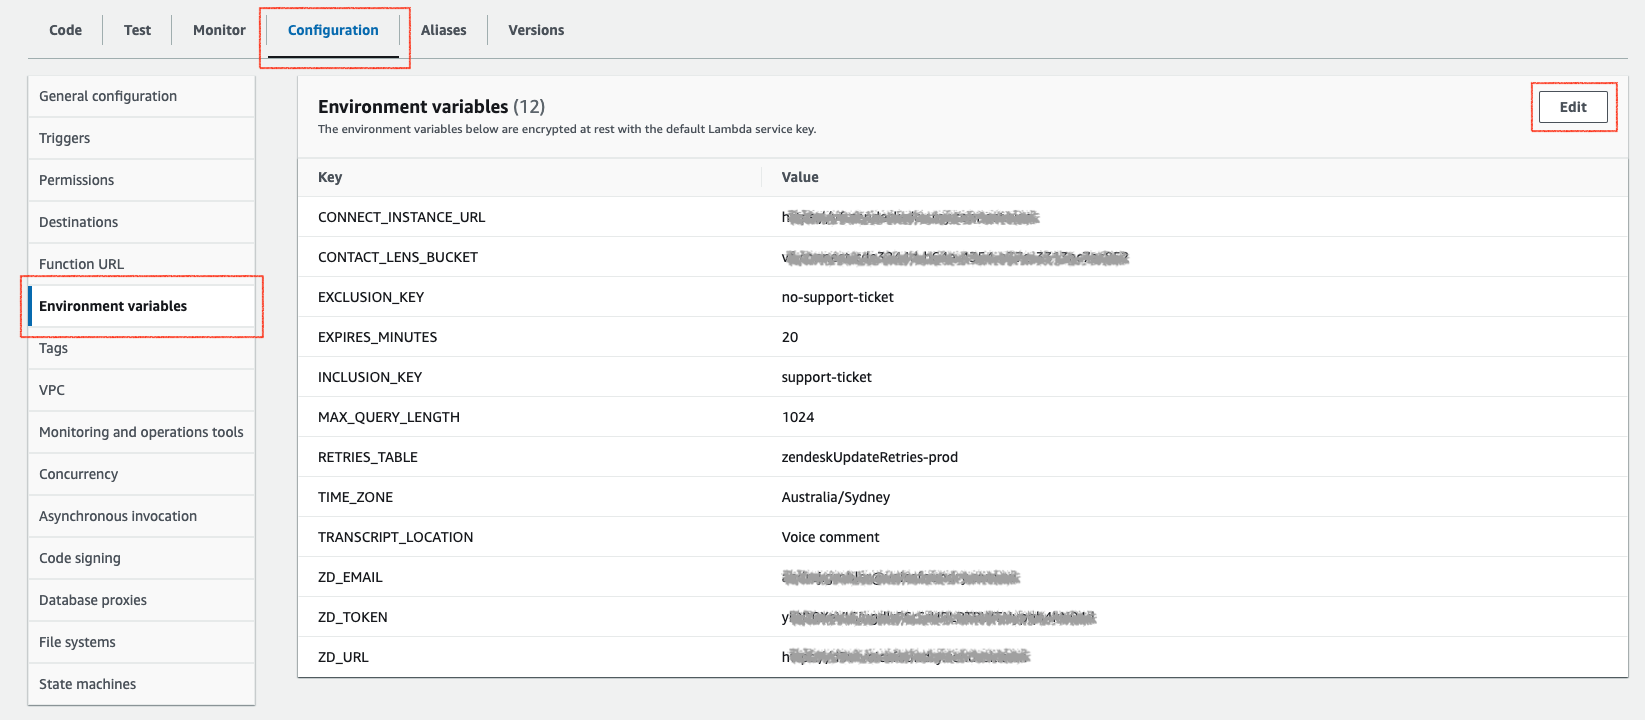
Open the Configuration tab, select Environment variables from the left sidebar and click Edit:
-
Update the value of TRANSCRIPT_LOCATION to either Voice comment or Internal note and hit Save.