Enabling Agent Status Sync
Upgrading the SAR application? Please read important note before doing so.
Introduction
Agent status sync is a feature that enables syncing of Zendesk unified agent status to functionally equivalent or similar status in the Amazon Connect app.
Once installed and configured, agents are able to manage the status in one place - Zendesk workspace, without without needing to do the equivalent change in the Connect softphone (CCP) after their Zendesk status has changed.
A dedicated settings page is available to a Zendesk admin, to configure mapping between Zendesk and Connect statuses. Both system and custom status types can be mapped. See the Administrator guide for details.
Prerequisites
For this feature to work, Omni-channel routing needs to be enabled in the Zendesk instance, as well as have the Agent Workspace turned on.
This feature is available in Amazon Connect app for Zendesk versions 3.1 and later.
Installation guide
To enable this feature a serverless application needs to be installed within the AWS Serverless Application Repository.
Sign in to the AWS account, then search for and select the Serverless Application Repository service.
Make sure you are in the same region as your Connect instance.
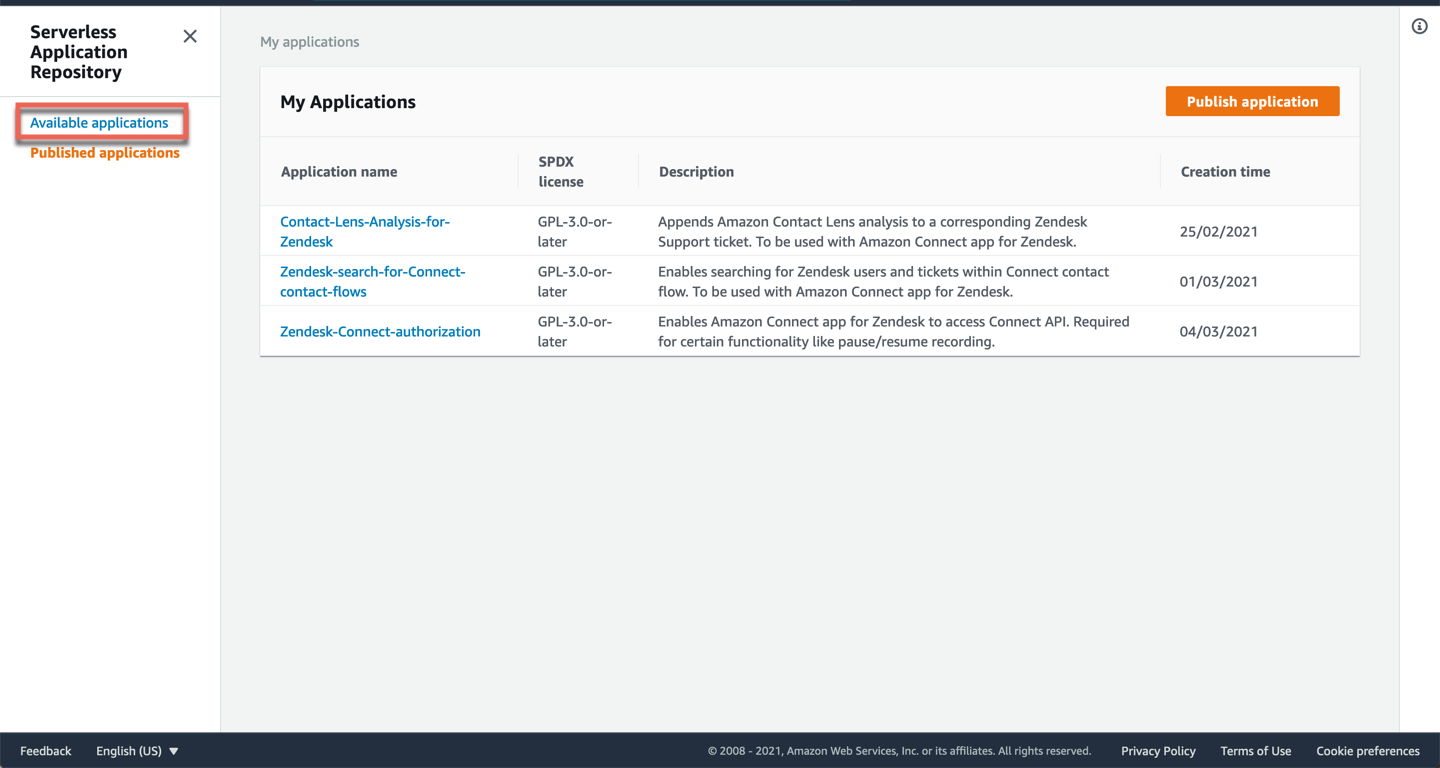
Click on Available applications.
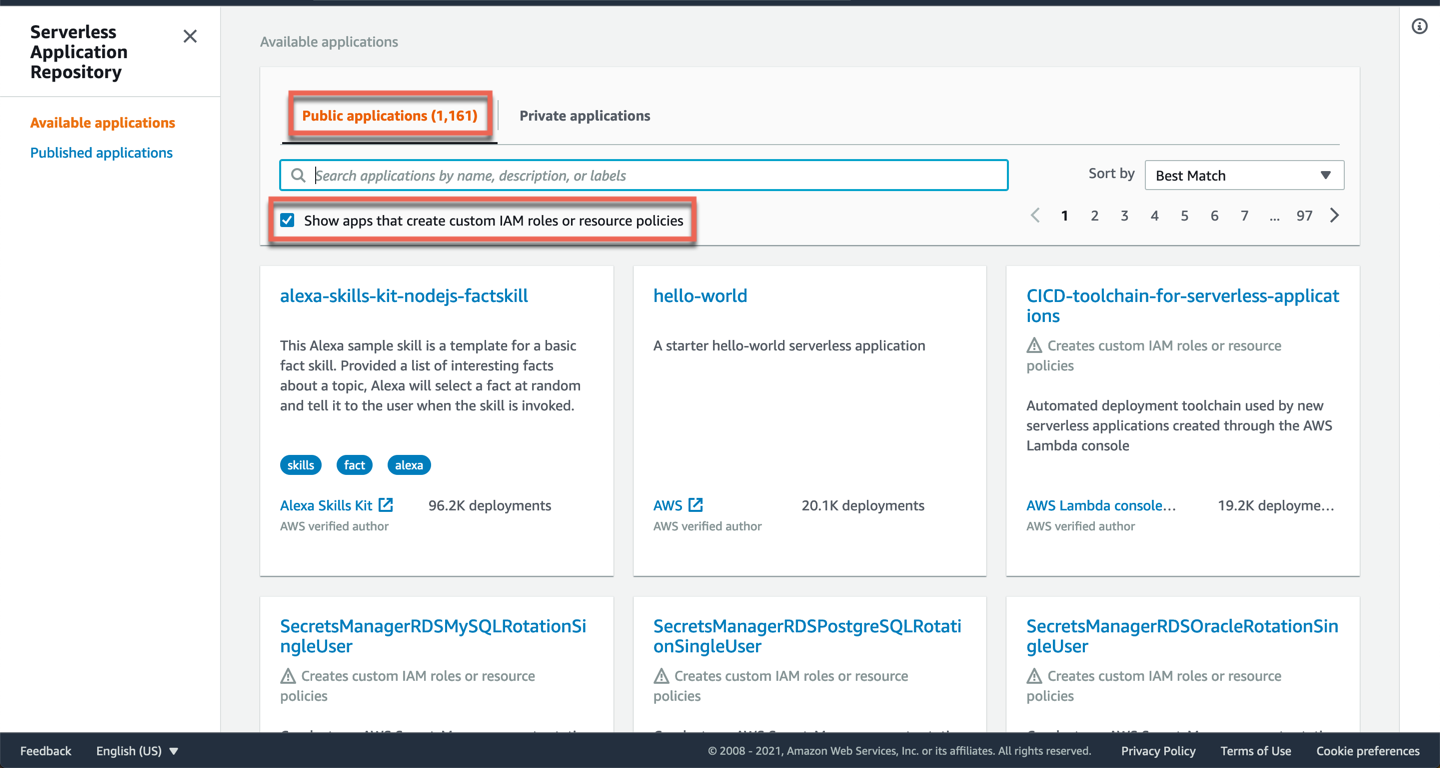
Under Public applications, select the checkbox Show apps that create custom IAM roles or resource policies.
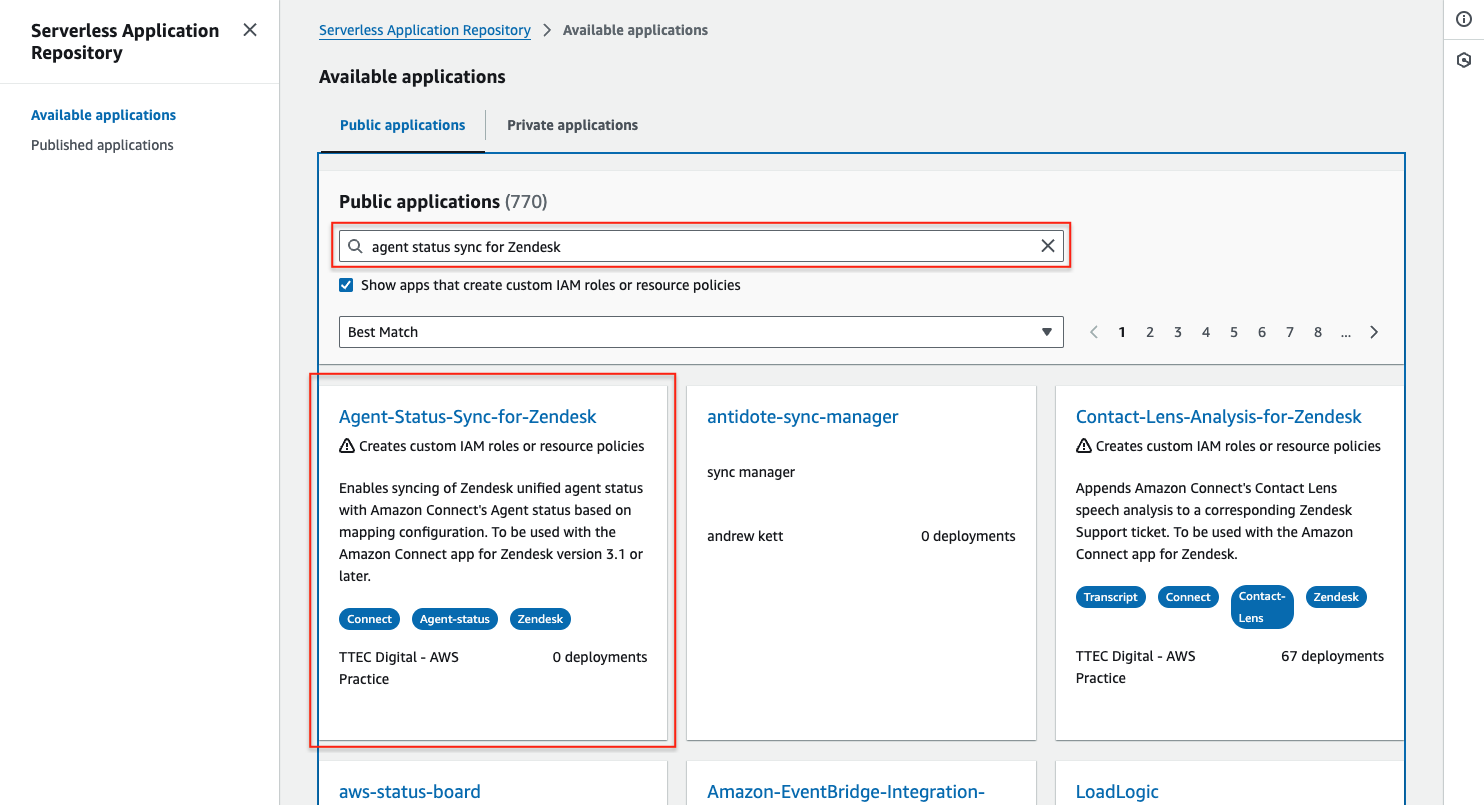
Search for and select Agent-Status-Sync-for-Zendesk.
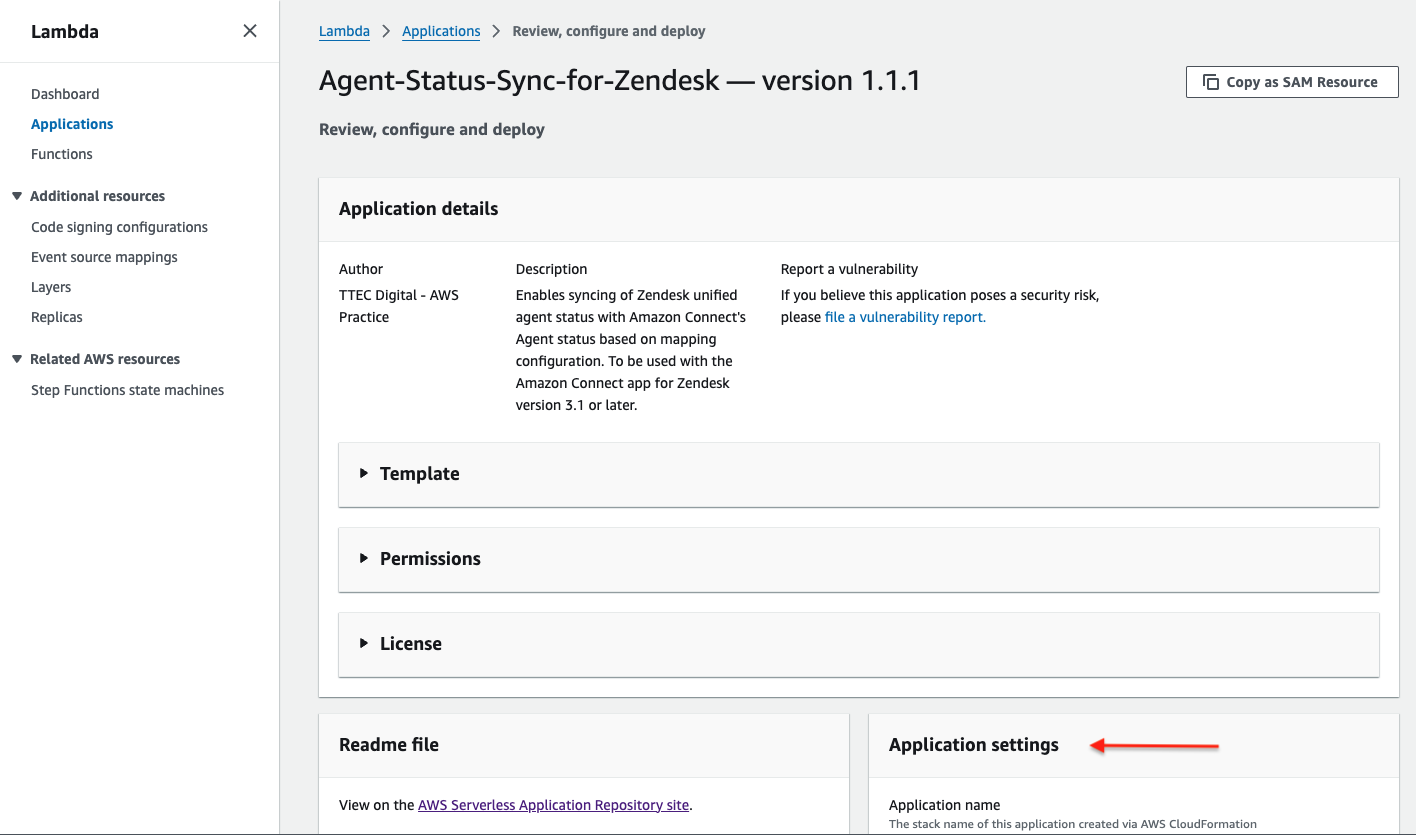
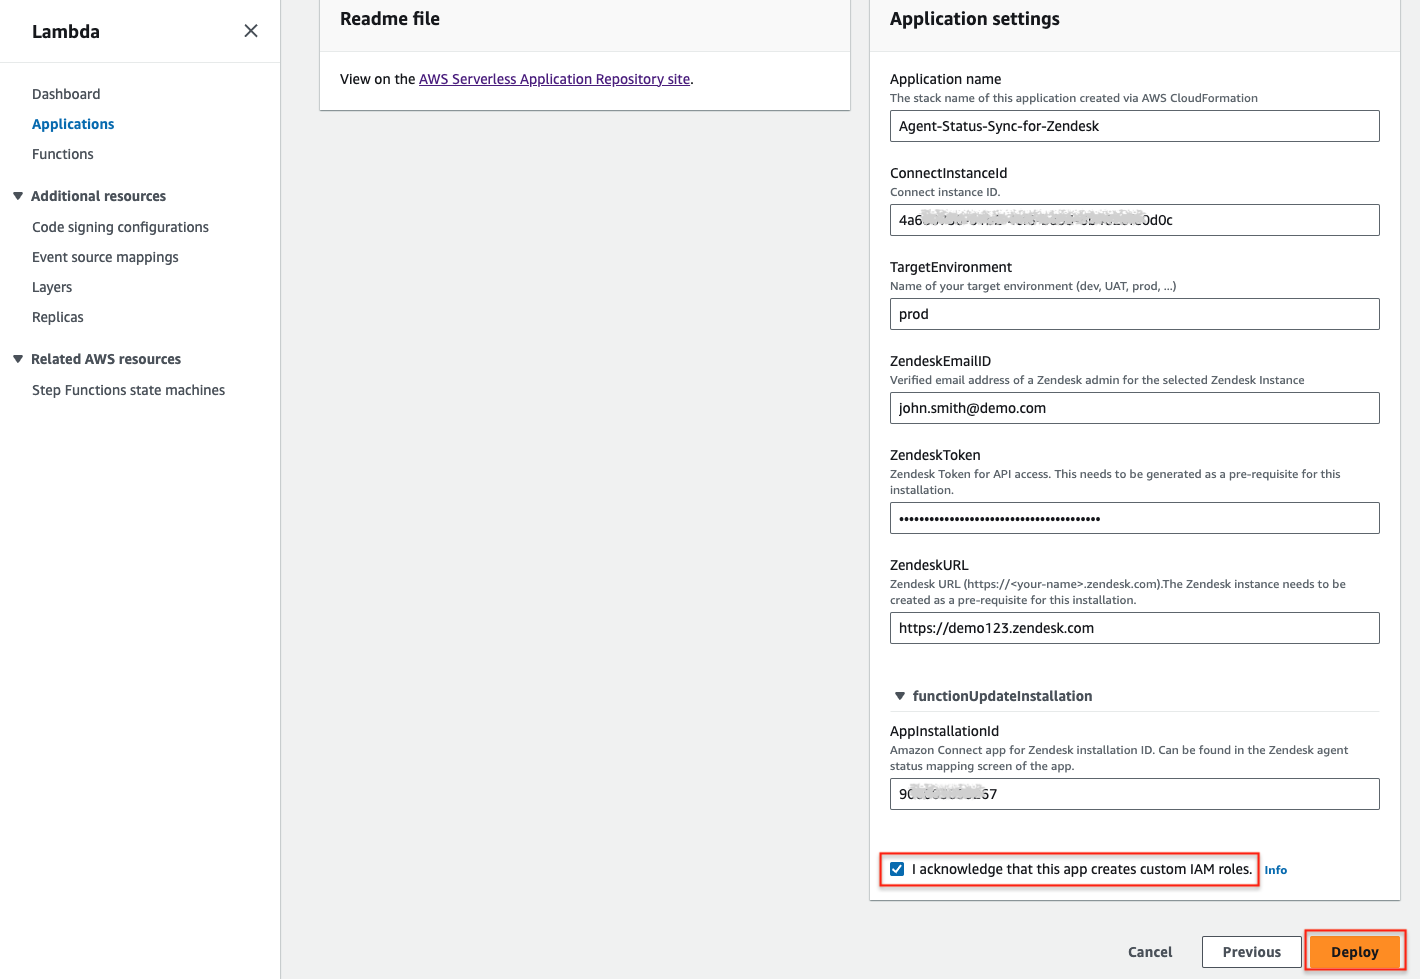
Scroll down to Application settings.
Enter the following information:
Application name
Leave this as is.
ConnectInstanceId
Enter the ID of the Connect instance.
To get your instance ID, log into your AWS console, select Amazon Connect service and from the list of instances select the one that’s associated with your Connect app.
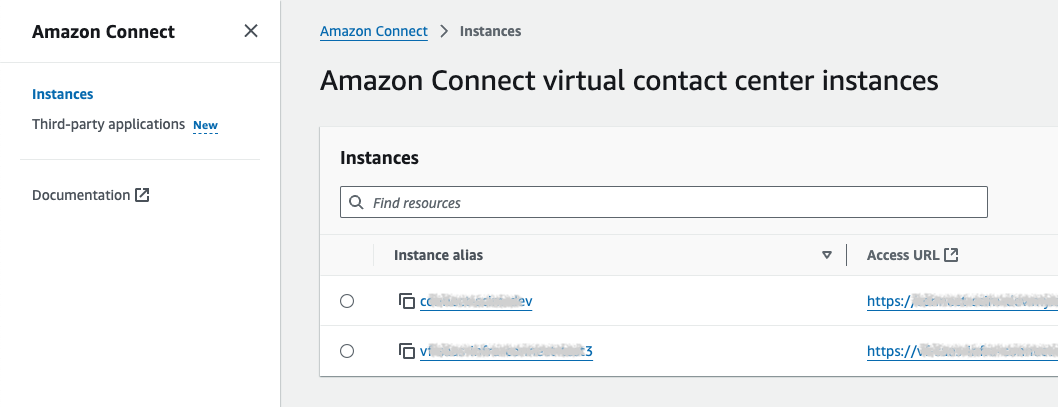
In the Account overview under distribution settings select and copy the last part of the instance ARN (after the last /):
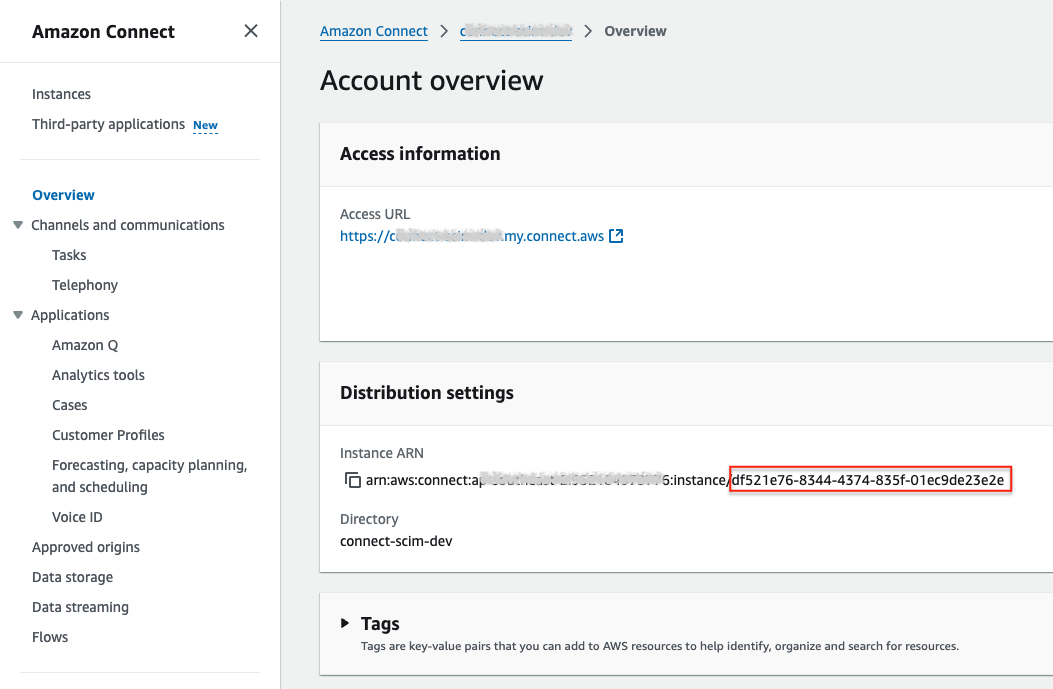
Make a note of the Access URL of the instance and ensure it matches the Amazon Connect URL in your app installation settings. The app supports both the legacy URL format awsapps.com and the current my.connect.aws.
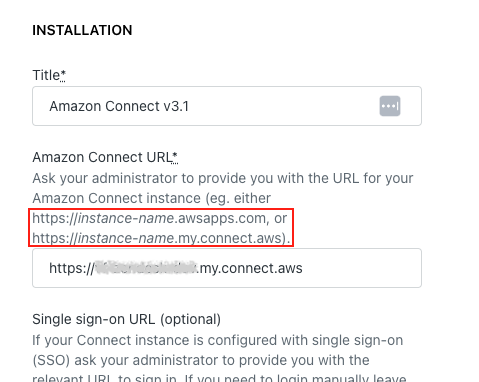
If the Amazon Connect app has been installed for some time, the installation setting could be using the old format whilst Amazon may have updated the Access URL to the new format. This would cause the deployment of the add-on to fail.
Ensure that the Amazon Connect URL in the app installation matches the Access URL listed with your Connect instance. Also, make sure to not include a / (slash) at the end.
TargetEnvironment
This is the name of the target environment (dev, UAT, prod etc). If unsure, just leave as prod.
ZendeskEmailID
Enter the verified email address of a Zendesk admin user for the Zendesk instance. It’s advisable to create a dedicated Zendesk user with admin privileges for the integration, so the functionality is not broken when a Zendesk user is removed (eg. if the related person leaves the company).
If either Zendesk Search or Contact Lens add-on features is already installed, the existing user created for those can be re-used, as long as it has admin rights.
ZendeskToken
Sign in to the Zendesk admin portal. Navigate to Apps and integrations → Zendesk API.
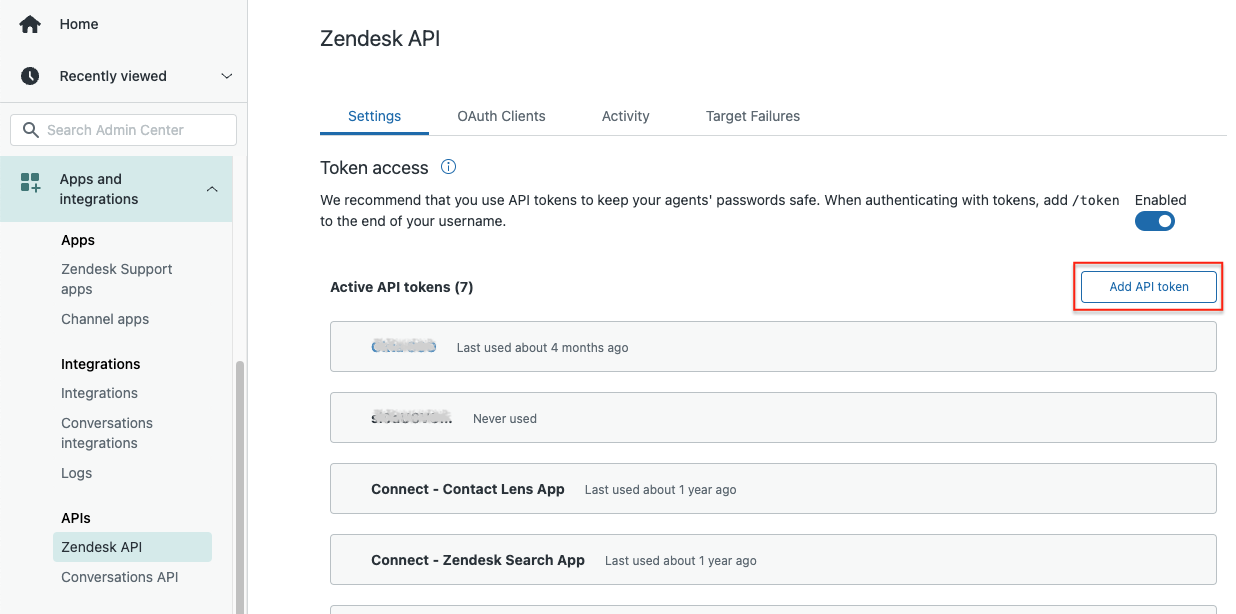
Click on Add API token.
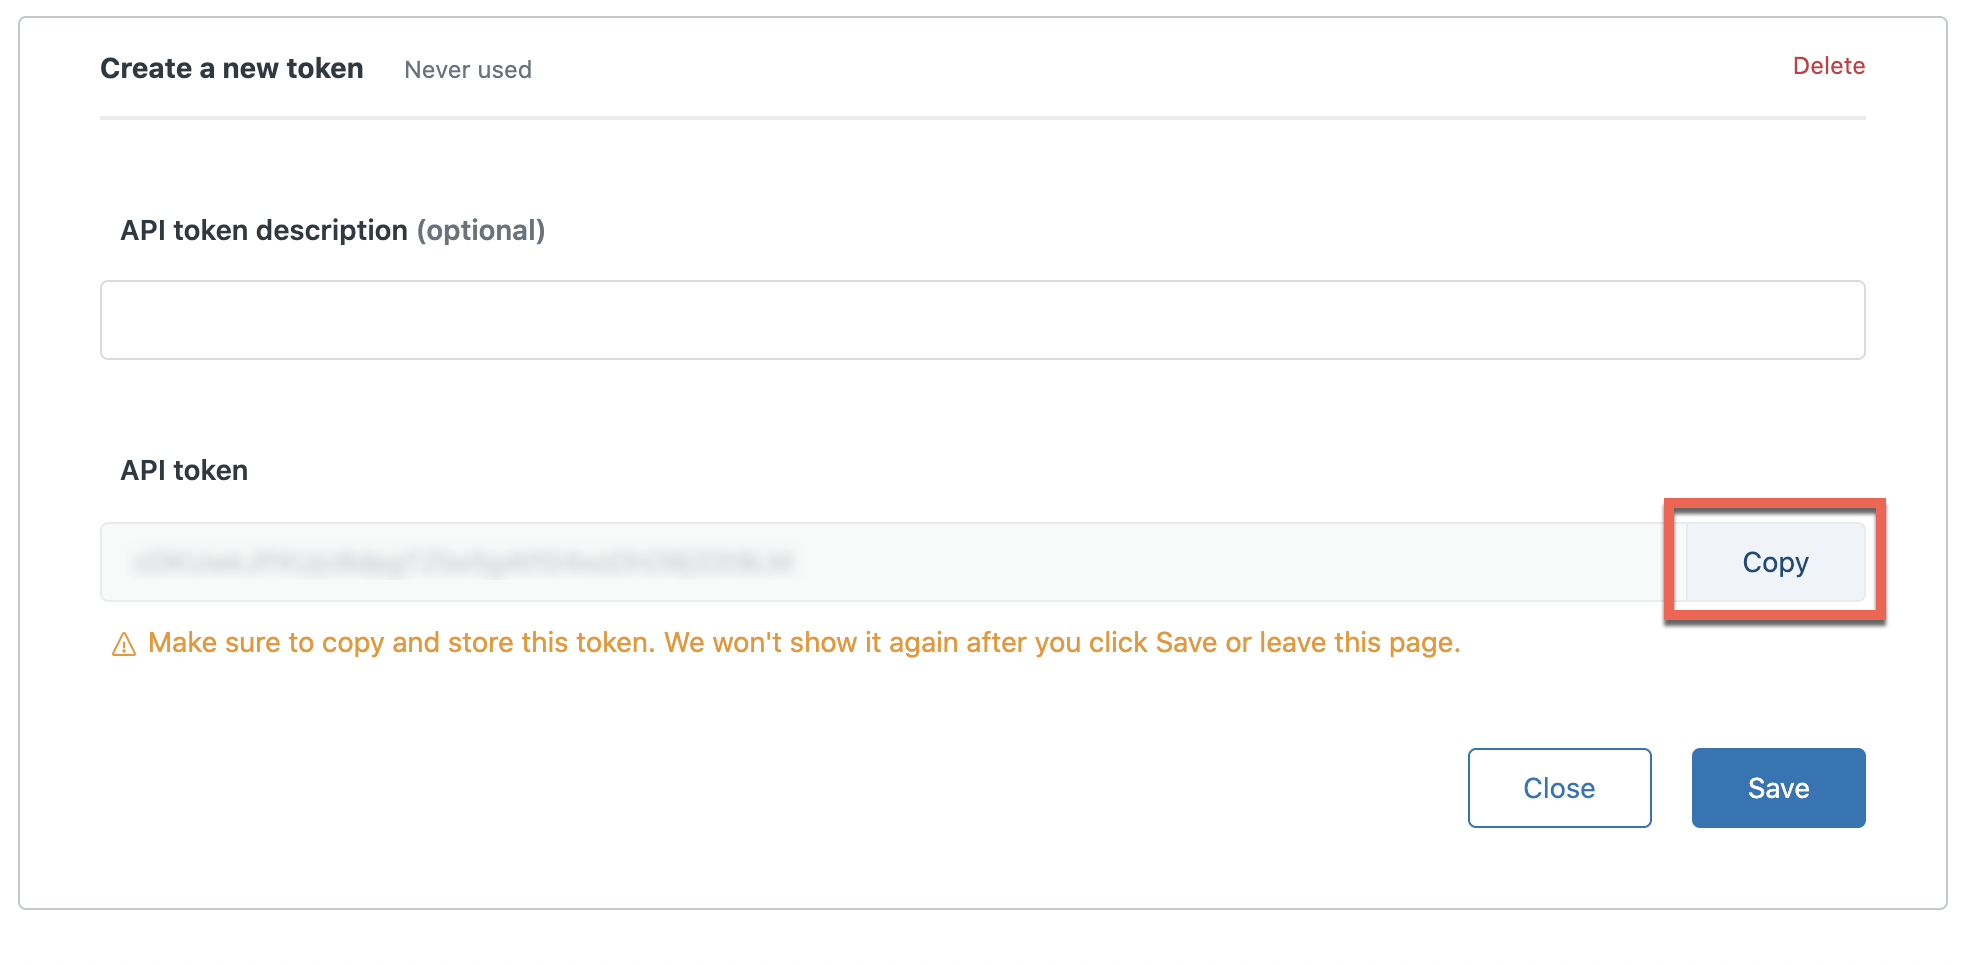
Click on Copy. Paste the API token into the ZendeskToken field.
ZendeskURL
Enter the URL of the Zendesk instance. Ensure the URL begins with https:// and do not include / at the end of the URL or the stack will fail.
AppInstallationId
Enter the ID of the Amazon Connect app installation. This can be obtained by logging into the Zendesk workspace as an admin, click on the app icon in the left navbar and select Zendesk agent status mapping:
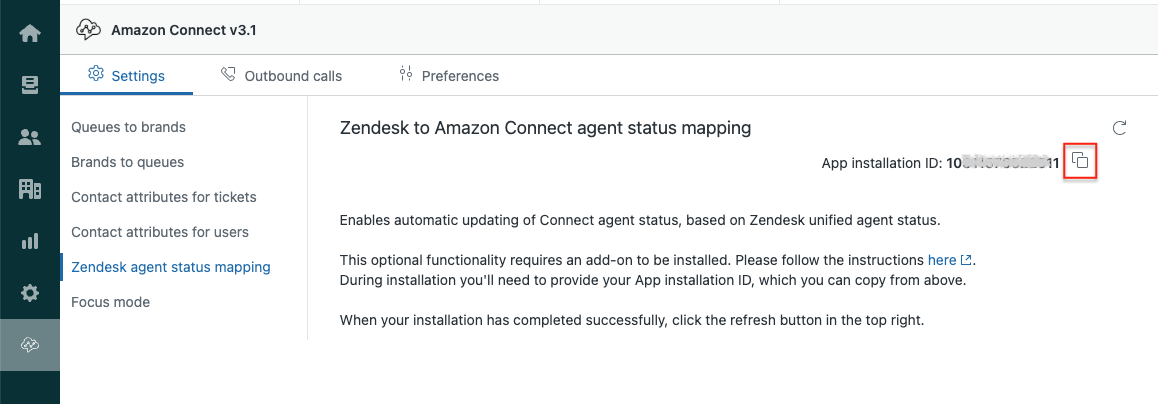
Hint - use the copy icon to save the App Installation ID to your clipboard.
With all parameters entered, select the checkbox to create custom IAM roles and click on Deploy.
When deployment has finished, return to the Connect app in Zendesk and click on the top right refresh icon.
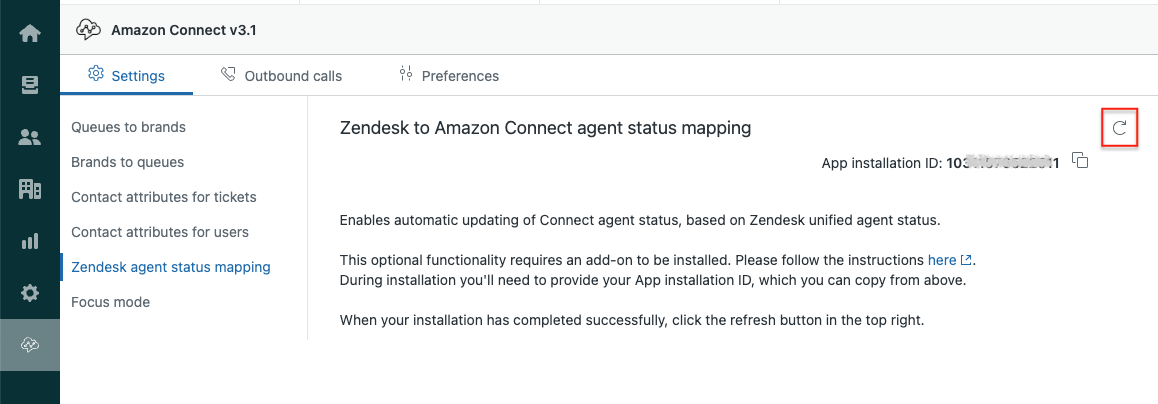
After reload you should see a page similar to this:
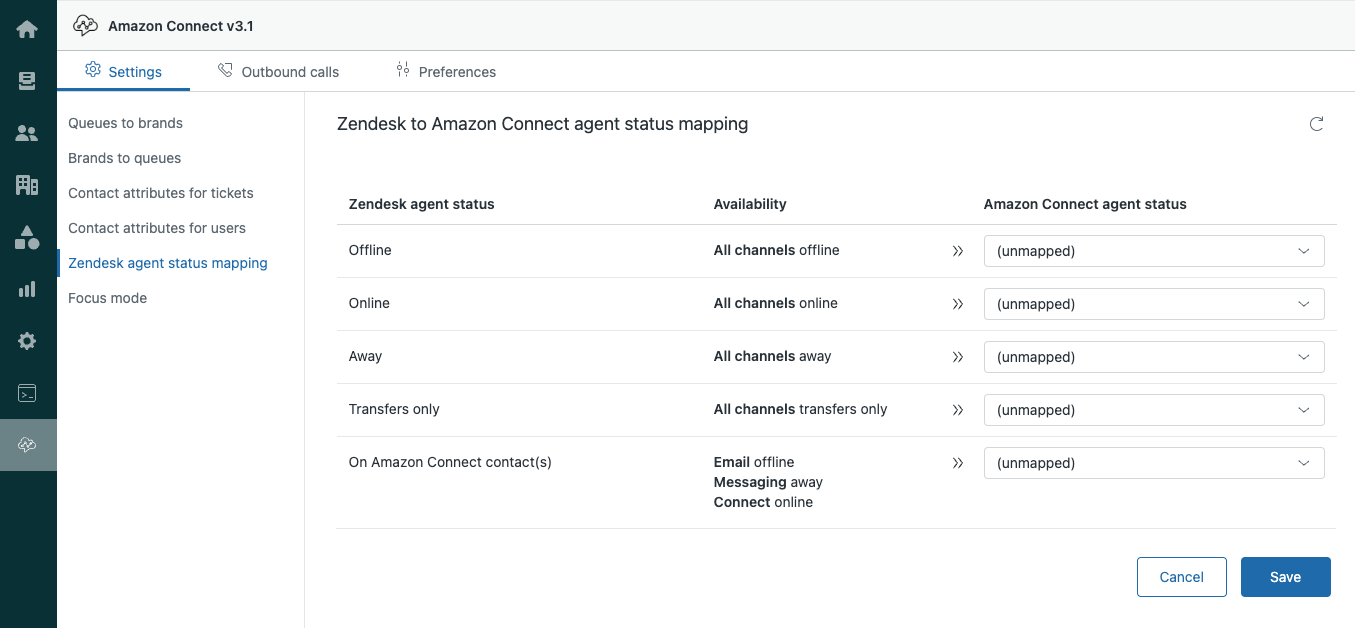
This means the add-on feature has been successfully installed and you can now start mapping your statuses - see how in the Administrator guide.
Important! After successful installation of this add-on all agents need to reload their Zendesk page, so that the status sync will be activated for them.
Troubleshooting
If the installation is unsuccessful, use the CloudFormation stack that attempted to deploy the required infrastructure to confirm the root cause and update the Amazon Connect app.
In the AWS console, navigate to CloudFormation service and select the stack of the SAR add-on, e.g. serverlessrepo-Agent-Status-Sync-for-Zendesk. Switch to Events tab and click on the button Detect Root Cause.
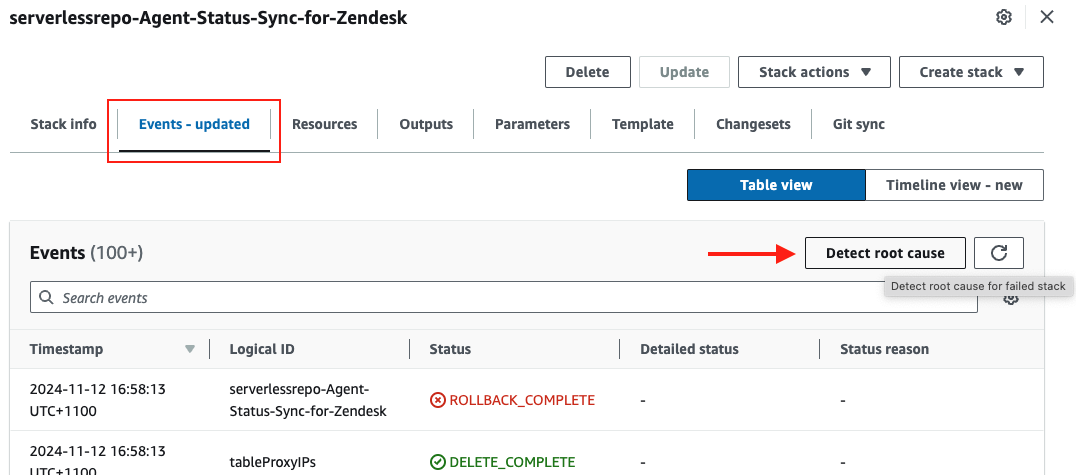
This should scroll down in the events table to the first event that caused the deployment to fail, e.g.
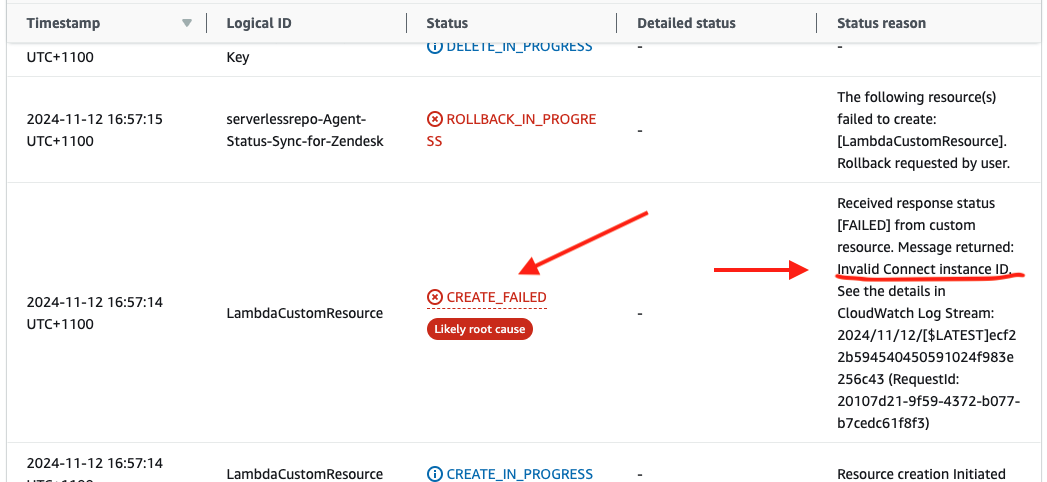
Review the Status reason. Most failures of this particular deployment fall into two categories:
lack of sufficient permissions to create resources. Ensure that the deployment is run under an admin account or account that has sufficient permissions to create all the required resources.
error response from the custom resource. This usually means that one or more parameters provided in the form above were incorrect. Review the message returned.
After establishing the root cause of the problem and are ready to try again, please make sure to delete the failed stack first.
If the root cause is not something you are able to fix yourself, please feel free to raise a support ticket with TTEC Digital.
